Pathology
How to accept incoming pathology
When HealthTrack receives pathology results, it tries to match the results to an existing patient and comes up with a ‘score’. If the score is high enough, HealthTrack automatically matches the result to a patient. Most of the time, HealthTrack is able to do this and the results will go into the ‘Incoming Documents Approval’ screen, to wait until they are accepted. So, the first place to look for pathology results is the ‘Incoming Documents Approval’ screen.
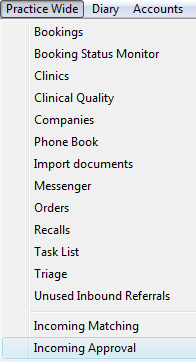
| From the menu bar select: Practice Wide > Incoming Approval |
 |
The Incoming Documents Approval screen will open:
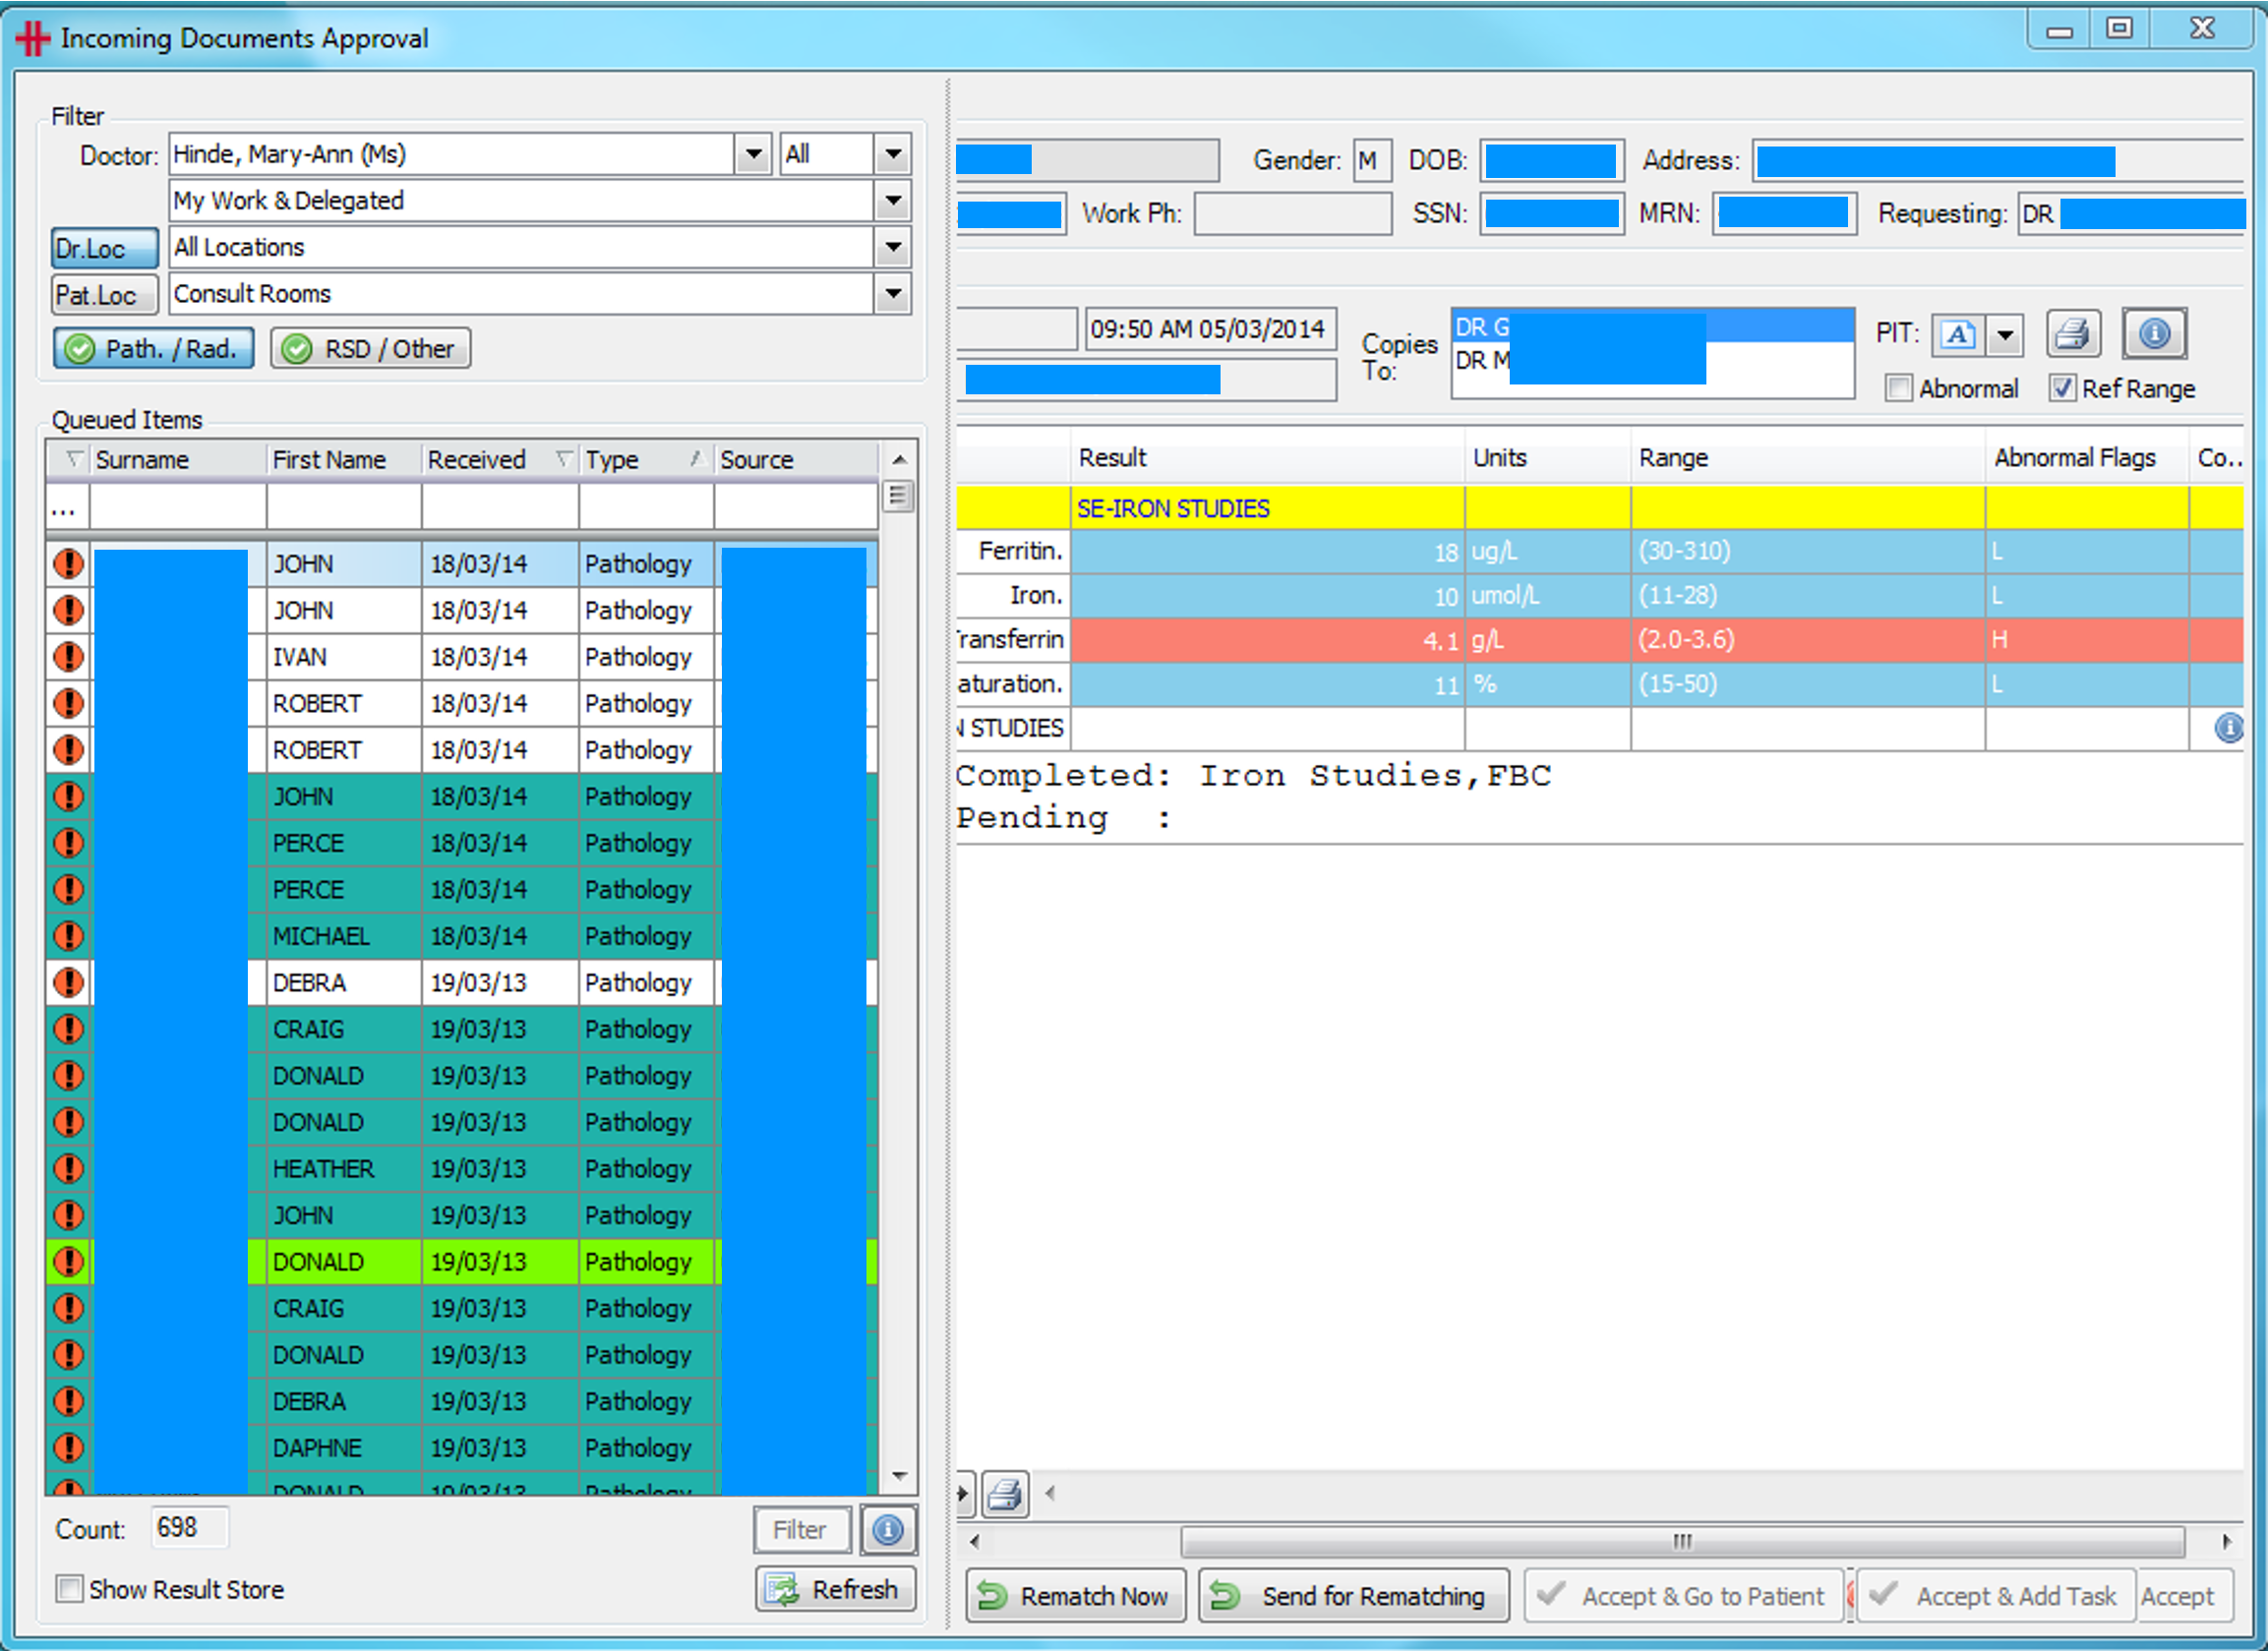
The screen is divided into left and right sections. The left lists results, while the right displays a single select result.
The left section has 2 areas:
Filter
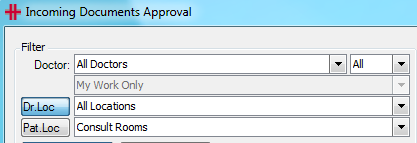
By default, the results will be filtered to the logged on doctor.
Results can be filtered by ‘Doctor’ and ‘Location’:
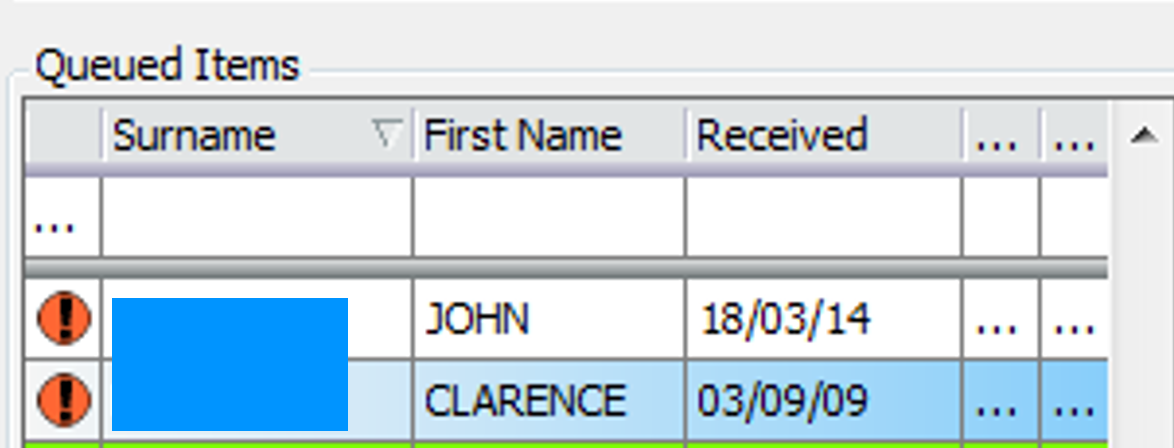
Queued Items
The grid on the lower left lists the results.
The first column is an alert
 , that
indicates the results has abnormal results.
, that
indicates the results has abnormal results.
There is one row per result set, thus a single patient may have multiple rows.
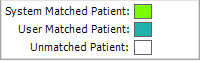
The Queued Items are displayed in 3 colours depending on their Matching status:
The user may sort the results alphabetical or date order by clicking the grey column headers.:
To view a result, click the rows with the results for that patient to display the result on the right section of the screen:

The bottom right of the screen has four options (NOTE: Accepting the results moves the results from this screen to the patient’s file (in the ‘Clinical Records’ tab)).

Accept & Go to Patient – Accepts the results and switches to the patient with the result selected. Use this to view the result in context of all other results for the patient.
Accept & Add Task – Accept the results and opens the ‘create a task’ screen (for a task relating to this patient).
NOT Required – Moves the results from this list without accepting the pathology (the pathology will not appear in the patient’s file) and places the result in the “result store”.
Accept – Accept the results and moves to the next result.
The bottom left of the screen has 2 options:

These 2 buttons are only available for “System Matched” and “User Matched” results.
-
Rematch Now – Switch to the matching screen to rematch to the correct patient now.
-
Send for Rematching – Send the result to ‘Incoming Documents Matching to Patients’ and for later matching.
Rematch Now , the following screen will appear:
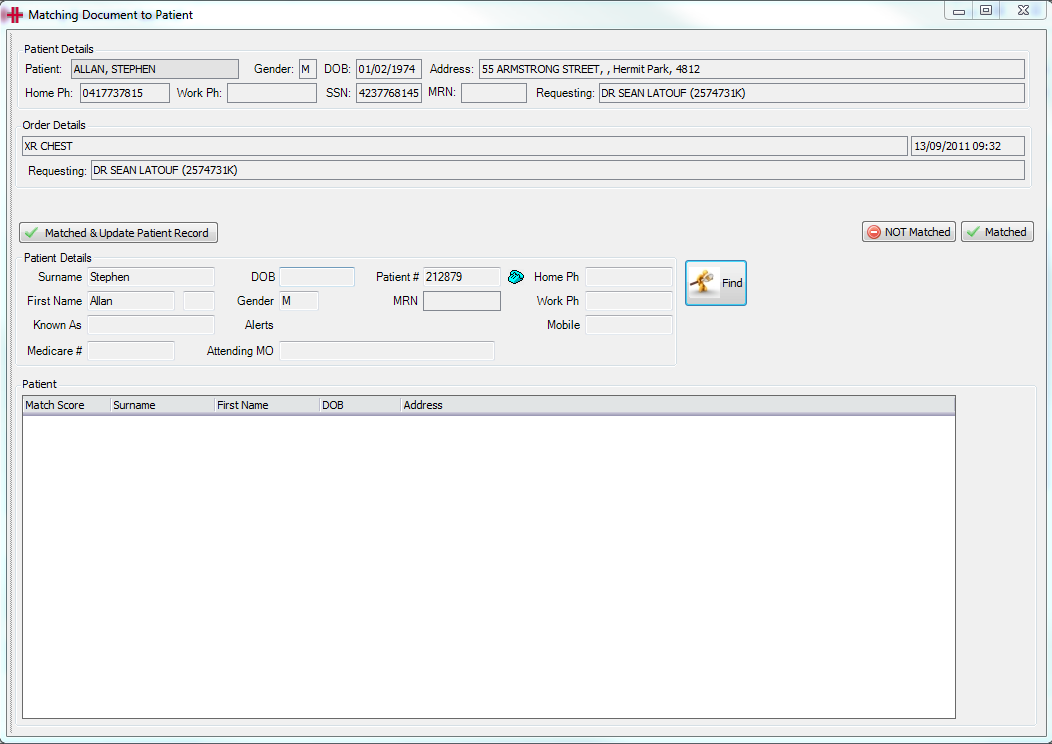
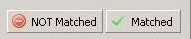
Select the patient in the bottom half of the screen to bring up their details and compare them against the result details. When you have found the match, you have three options:
Not Matched – Sends the result to the ‘Incoming Documents Matching to Patients’ screen.
Matched – Changes the colour of the results to teal (blue-green). The result can now be accepted.
Matched & Update Patient Record – this will bring up the ‘Merge Patient Details’ screen.
4. The ‘Merge Patient Details’ screen shows the differences between the results and existing patient details.
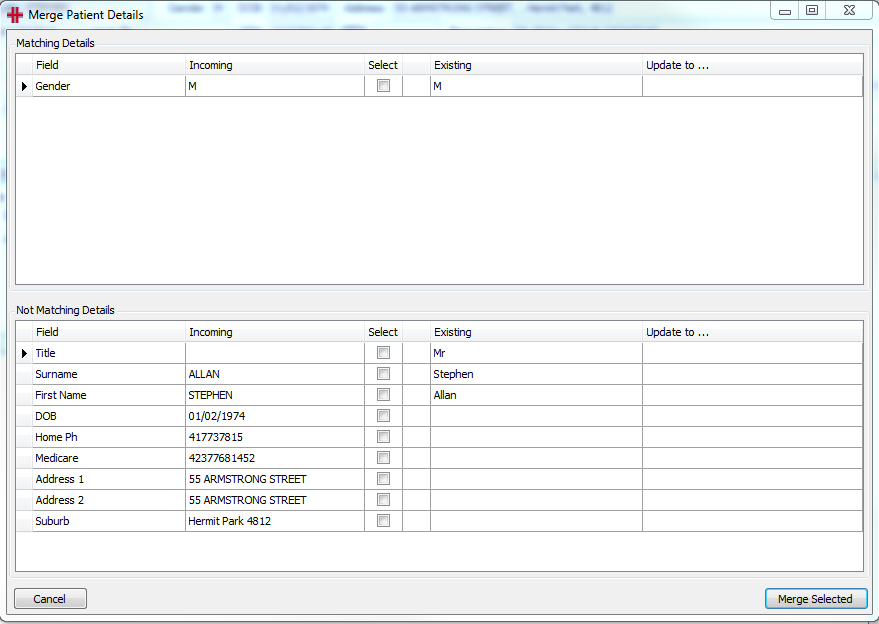
5. If you would like details from the results to over-write details from the existing patient, tick the relevant box. In the example, the Medicare number will be added from the result to the HealthTrack ‘Patient Demographic’ tab.
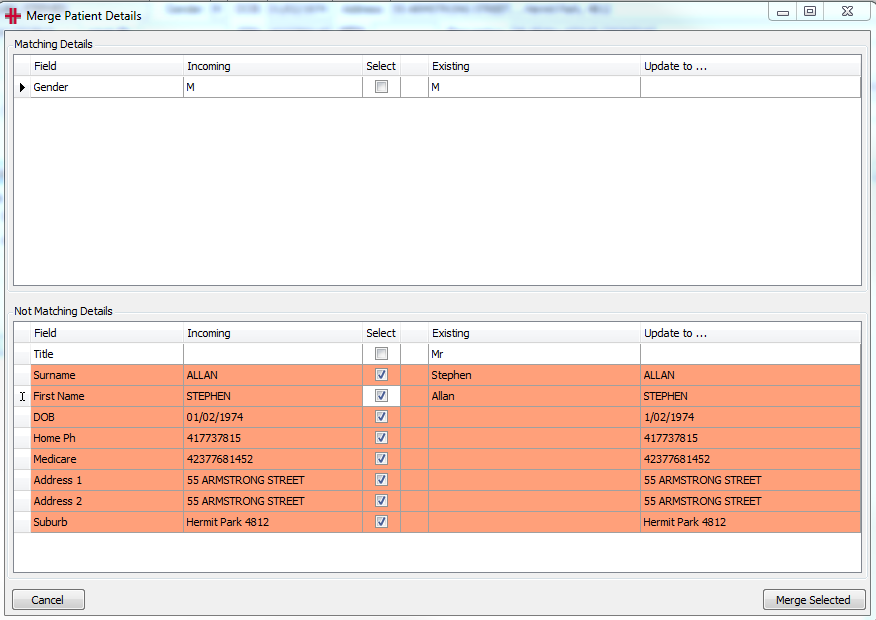
6. Click ‘Merge Selected’ when you are happy and HealthTrack will match this pathology. You will have to go to ‘Incoming Documents Approval’ in order to accept this pathology.
Cannot find the patient under ‘Incoming Documents Approval’
| 1. Click on ‘Incoming Matching’ in the ‘Practice Wide’ menu. |
|
2. The Incoming Documents Matching to Patients screen will open:
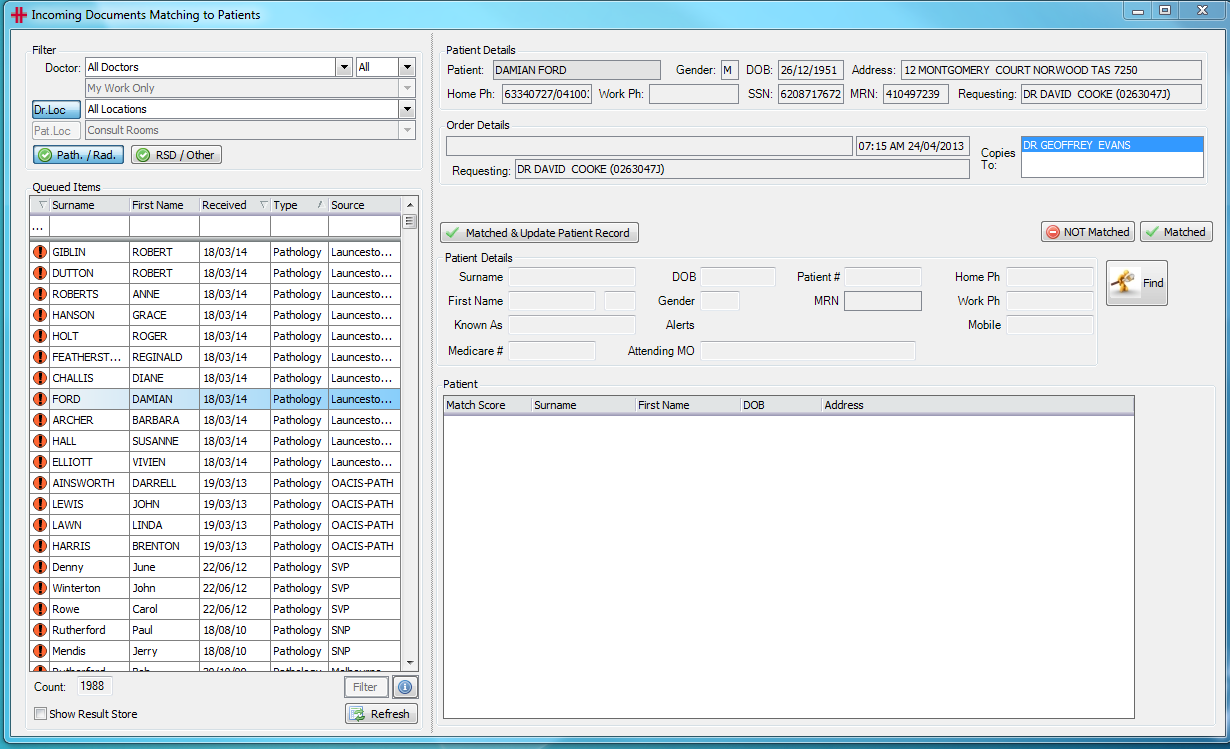
3. The unmatched patients are on the left, and the columns work the same as the ones in the ‘Incoming Documents Approval’ screen. On the right is a list of possible patient matches. Click on a potential match and the patient details will come up on the screen for a visual comparison.
4. Select the patient that is the correct match and click on the ‘Matched’ button.
5. On clicking ‘Matched’, the ‘Merge Patient Details’ screen will come up. Follow the steps in the section above to complete this. You will have to go to ‘Incoming Documents Approval’ in order to accept this pathology.
How to match incoming pathology
Incoming Document Matching is a process of allocating any documents sent via electronic transfer to Health Track.
Each document has to go through a search system in order to be matched to a patient. This process starts in the Processor.
When a document is received by the Processor, it performs the following searches:
A – Search for Patients with the same first name (or the first 3 characters), same surname and same Medicare number or DOB.
B – Search for Patients with the same first name (or the first 3 characters), and same Medicare number or DOB.
C – Search for Patients with the same surname and same Medicare number or DOB.
If a document is successful in these searches it will be sent form the Processor to the Incoming Document Approval Screen. If a document is unsuccessful in these searches it will be sent from the Processor to the Incoming Document Matching Screen.
When a document is received in the Incoming Document Approval Screen searches are still preformed on the document to make sure it is a match with the patient the Processor has matched it to. These searches are as followed:
A – Search for patients with the same first and surname
B – Search for patient with the same first name (or the first 3 characters) and same surname
C – Search for patients with the same surname and DOB
D – Search for patients with the same first name (or first 3 characters) and the same DOB
If a document again is successful for these searches it will stay in the Incoming Document Approval Screen and wait for Approval, if it is unsuccessful it will be returned to the Incoming Document Matching screen.
The Incoming Document Matching Screen is a manual matching process. The documents which have been unsuccessful in the Processor and Incoming Document Approval Screen searches are now put through a scoring system. Each document needs 4 points for a match to be approved. The points are scored by the following requirements:
2 points if the patient’s Medicare number matches
2 points if the first name matches (non case sensitive)
1 point if the surname matched (non case sensitive)
1 point if the DOB matches
If a document has a match score of 4 or more it can be matched by the user and it will be sent to the Incoming Document Approval screen.
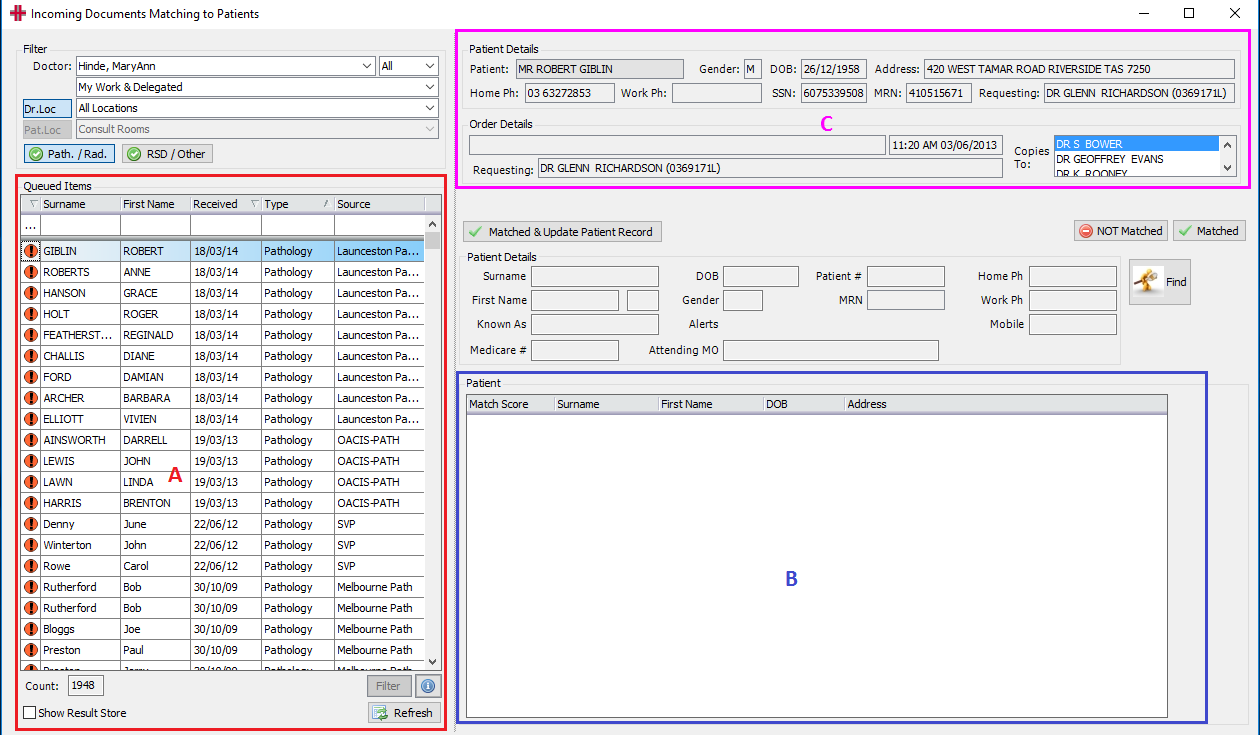
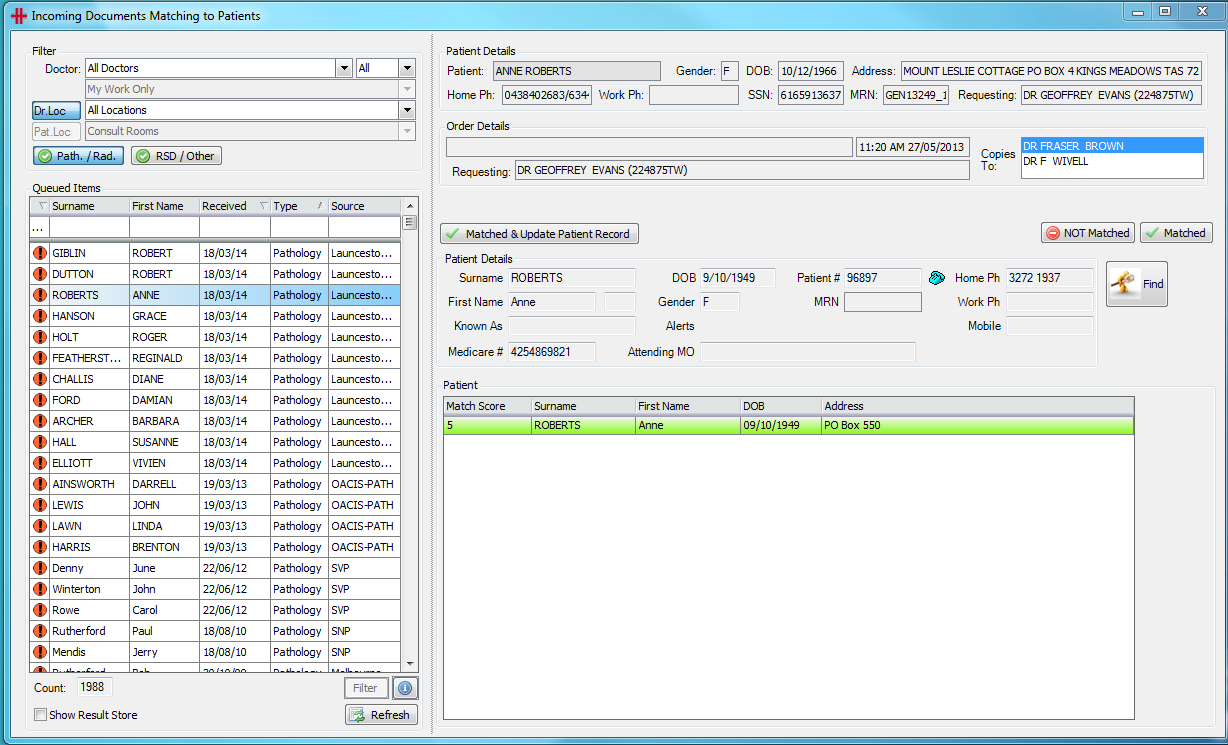
Figure 1 - Incoming Documents Matching to Patients
Figure 1 - Incoming Documents Matching to Patients screen (on the demographic screen open Practice Wide, Incoming Matching). This is how the user will manually match the documents to the patient.
Box A in Figure 1 - Incoming Documents Matching to Patients displays all the documents waiting for matching. Clicking once on a patient (or highlight a patient) will display the patient details and the document details in box C. It will also display any details of possible patient matches in box B.
For example the patient Laura Westfield has been highlighted (clicked once on) in box A. The patient’s details and document details are displayed in Box C and 1 possible match is displayed in box B.
The possible match in box B in Figure 1 - Incoming Documents Matching to Patients shows a match score of 6. This means the patient’s Medicare number is a match (2 points), first name matches (2 points), surname matches (1 point) and date of birth matches (1 point).
If the user agrees with the match then highlighting or clicking on the
patient details in box B will bring the details up into the Patient
Details section just above this box. From here the document can be
matched by pressing
 . This will
move the document into the Incoming Documents Approval.
. This will
move the document into the Incoming Documents Approval.
Other options on this screen include a Filter for the Queued Items to limit the amount of documents displayed in box A of Figure 1 - Incoming Documents Matching to Patients.
 allows the user to match and
update the patient’s details in the Patient Record. This can be used
when a patient has not informed a change of address etc. to the
Practice, but the new details came on the document.
allows the user to match and
update the patient’s details in the Patient Record. This can be used
when a patient has not informed a change of address etc. to the
Practice, but the new details came on the document.