Admin Maintenance
Clinical Report Configuration
The Report Config Editor accessed via the Admin>Maintenance>Clinical Report Configuration menu is responsible for allowing users to configure clinical reports. The reports are configured per site, changing a report will affect all users who use that report as well as any reports that are sent out as part of the distribution system.
*NB* Reports are being progressively implemented to the configuration editor and not all reports will be able to be managed through this screen, some reports will still be under the existing report configuration editor maintained by the HealthTrack development team. If the report is in the screen, then it is able to be managed by a user.
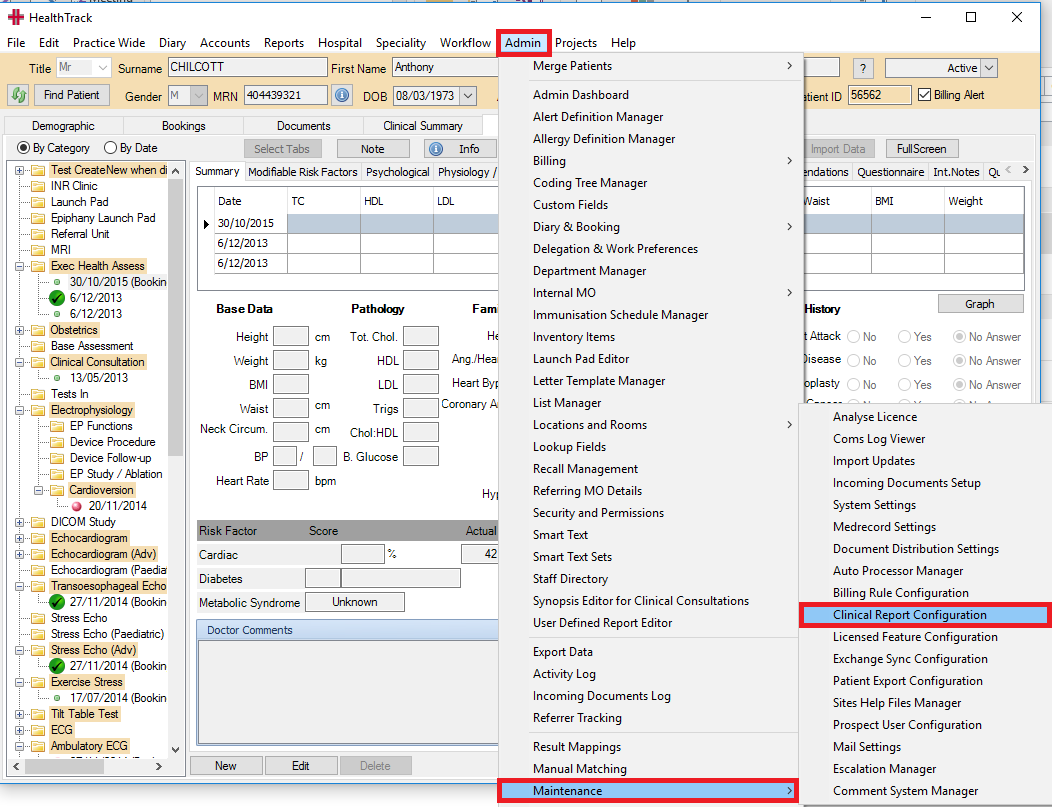
The Report Config Editor is accessed via Admin> Maintenance> Clinical Report Configuration.
The screen is divided into 3 sections:
-
A list of all reports available for user management in the Report Config Editor
-
The linked reports for each clinical record
-
Report Configuration section
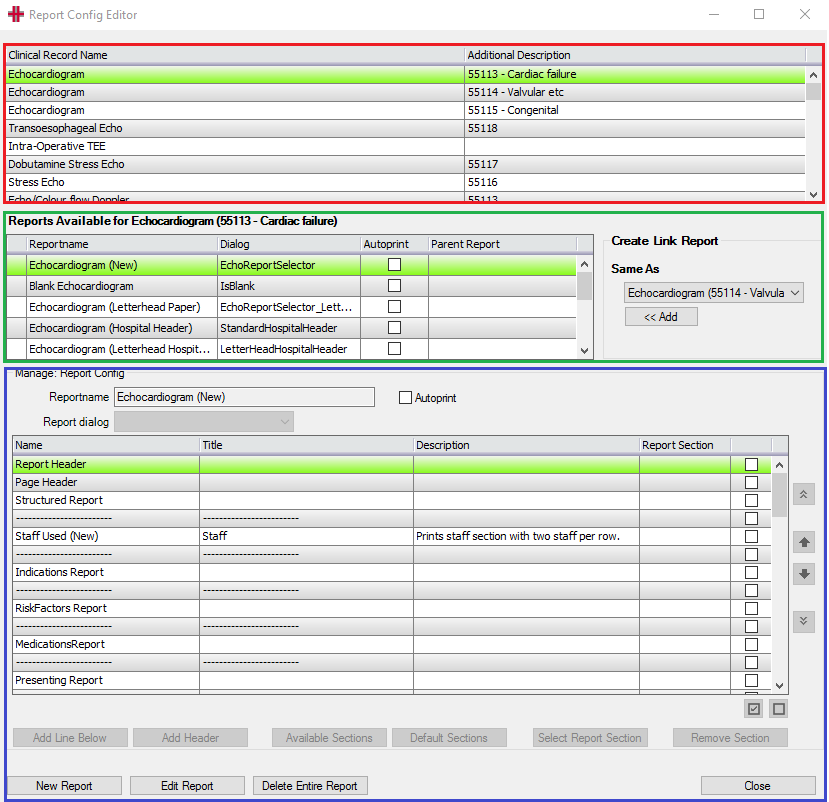
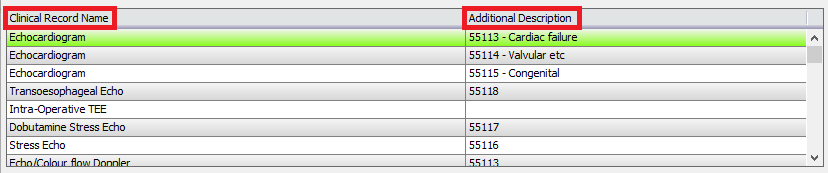
- The Clinical Record Name is the name that is printed on the report, and the Additional Description column equals the Sub-Type field values from the Clinical Detail screen in the related Clinical Record. E.g. Echocardiogram
Report Config Editor
Clinical Records – Clinical Detail screen

- Linked reports are reports that are linked to another report. Linked reports exist so that you can have one report configuration that is used by multiple clinical records and therefore changes only have to be made to one report to change all the linked clinical records reports.
When a report is selected, the linked reports will be displayed in the ‘Same As’ list to the right.
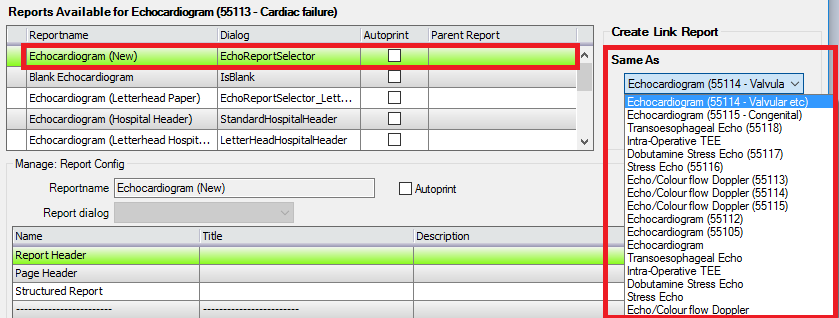
When any of the linked reports are selected, they display in the reports Available for XXXX report (e.g. in this example the Echocardiogram(55114-Valvular etc) list with the chain icon in the left hand column.

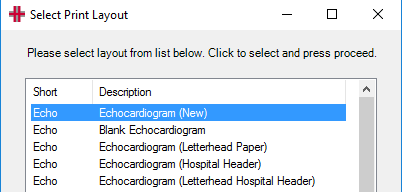
- Each clinical report has multiple report layout options available when you have a Clinical Record selected and you press Print.
When editing a report in the Report Config the following applies:
-
The Report Header/Report Footer will only appear once and will always appear at the top/bottom of the report.
-
The Page Header/Page Footer will always appear at the top/bottom of each page.
-
The rest of the sections will appear in the order defined in the Clinical Report Configuration screen. If there is no data to print in a configured report section, then it will not appear in the report.
-
If you add a Structured Report section to the report, by default this will print all the text from the Report tab unless a section is selected. If you select a section, then only the selected section will print. If you want multiple sections printed in different places then you will need to add multiple Structured Report sections. The sections that appear are the same major headings that appear on the Report tab on new clinical records. To configure these sections please see the documentation on Smart Text.
-
Changes are immediate and can be tested by returning to the applicable clinical record and printing a report
Alert Definition Manager
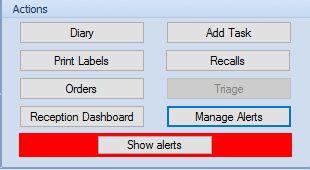
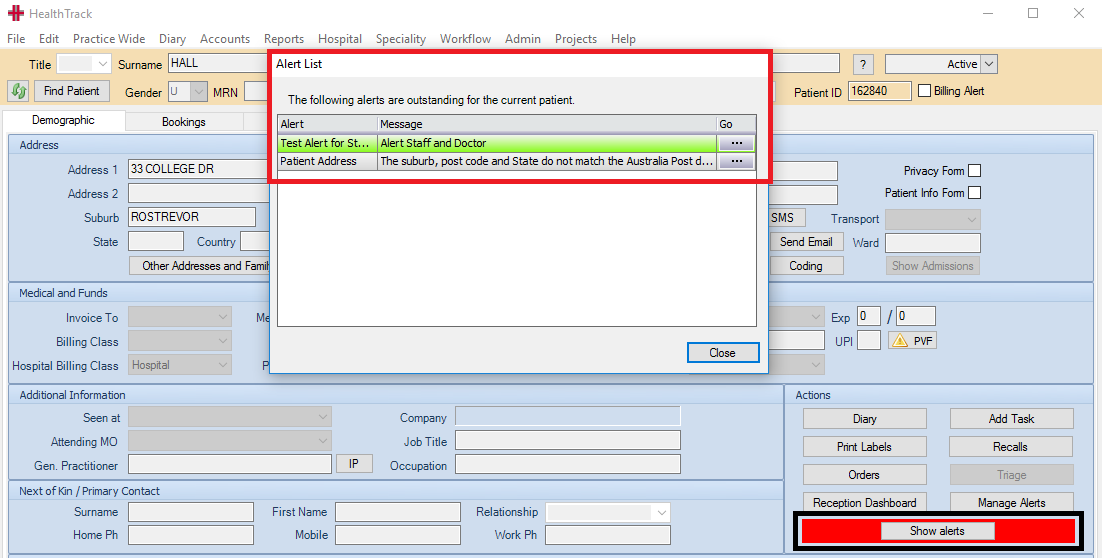
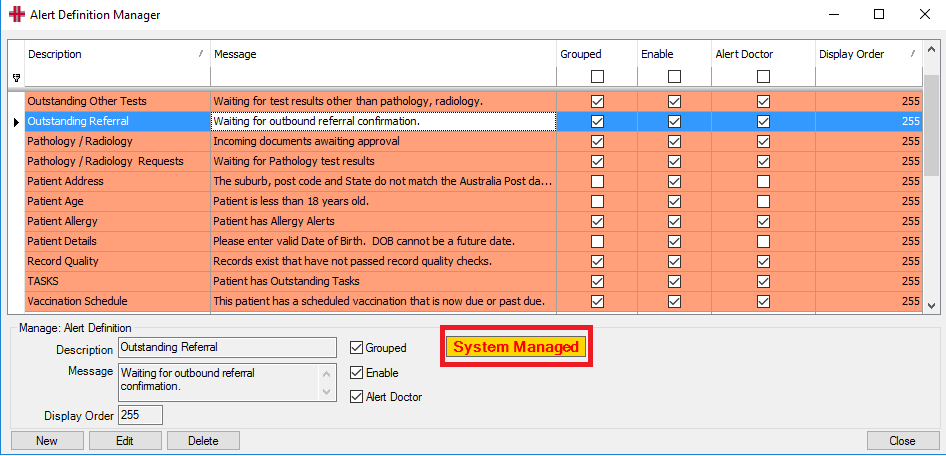
The Alert Definition Manager displays System Configured Alerts, as well as users being able to Add/Edit and Delete Alerts for patients. These alerts display in the Alert List when a patient is brought in to session or when navigating to the Patient Demographic screen from within the system. The user is also visibly prompted to the existence of alerts on the patient by the Show alerts button on the Demographic screen being highlighted in red.
The Alert Definition Manager screen is accessed via the Admin>Alert Definition Manager menu option. There are a number of alerts that come as factory defaults when HealthTrack is installed to ensure users are alerted to critical patient information, such as receipt of Pathology/Radiology results, an under 18 patient, outstanding tasks on a patient etc. These are highlighted in Orange and cannot be edited or deleted by users.
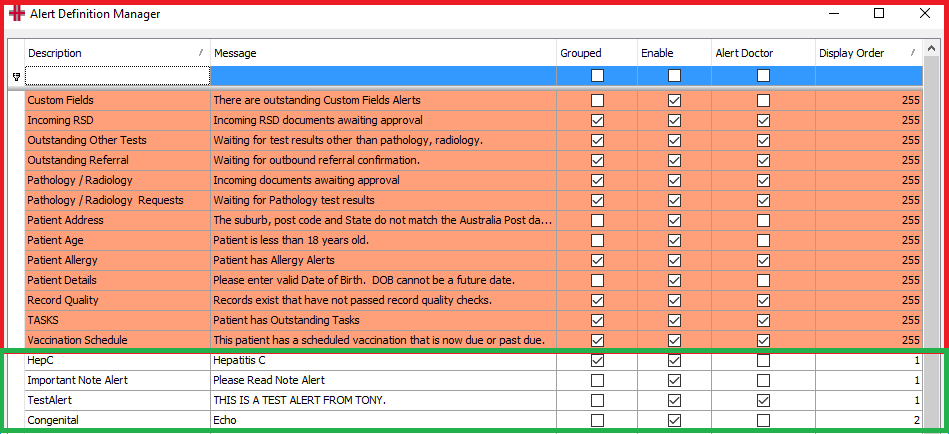
Alerts that have been added by users will display as white.
The columns in the Alert Definition Manager are as follows:
Description – The name of the Alert and the text that will display in the Alert column of the popup message
Message – The description of the Alert and the text that will display in the Message column of the popup message
Grouped – Represents all users other than doctors, who will receive the popup message when navigating to the patient’s demographic screen. If you do not need the alert to display for doctors then this field and the enabled field would be ticked and not the Alert Doctors field
Enable – Activates the alert. If not ticked the alert will not display for any selected users
Alert Doctor - Doctors will receive the popup message when navigating to the patient’s demographic screen. If the message is only to display for doctors, then this field and the Enable field would be ticked and not the Grouped filed.
Display Order – This determines the order in which the Alerts will display in the popup screen. As a default value the highest number of 255 is given, if the user wants to have a value appear above others then a smaller numeric value, i.e.1, will determine the display order.
Adding/ Editing or Deleting an Alert
The Manage: Alert Definition box at the bottom on the Alert Definition Manager screen is used to Add, Edit or Delete an Alert.
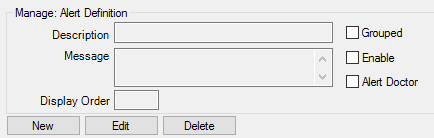
New – Select the New button, add the details for the new alert and save to finalise.
Edit – Highlight the alert to be edited and then select the Edit button and make the required changes, then save to finalise.
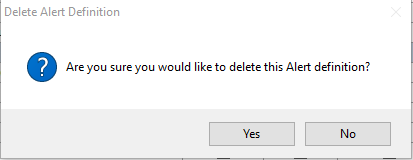
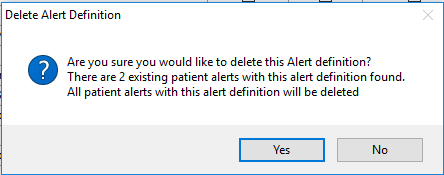
Delete – Highlight the alert to be deleted and then select the Delete button. A popup warning will display, which will vary depending on whether the alert has been put on any patient records or not.
If proceeding with the deletion, select Yes and if not select No. Once deleted the alert immediately disappears from the alert list.
Alert not on any patient records
Alert has been added to patient records
NOTE – If you highlight a system managed alert the System Managed button will display at the bottom of the screen. The system will not alllow any changes to the Description, Message or User groups for these alerts. The only maintenance that can be performed is to remove the alert from being enabled by deselecting the Enabled button. These alerts cannot be deleted.
Adding/Editing or Deleting an Alert on a Patient’s Record
Alerts are added/ edited or deleted on a Patient’s record via the patient demographic screen.
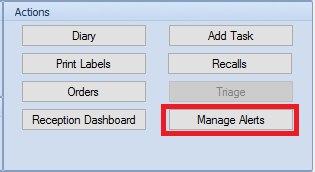
- From the Actions field select the Manage Alerts button.
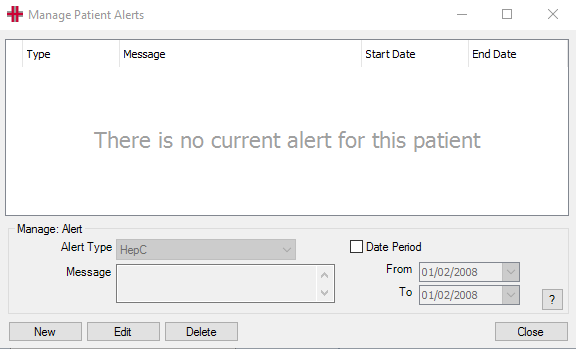
- This will open the Manage Patient Alerts screen
-
If adding a new alert then select the New button or if editing an existing alert, first highlight the alert and then select the Edit button. If deleting an alert, first highlight the alert and then select the Delete button.
-
If adding or editing an alert, input the required details and select Save to finalise. An alert can be put on for a Date Period if required, but this is optional. This may be used when an alert is no longer required for historical purposes, rather than deleting the alert from the patient’s record.
-
If deleting an alert, then select the Delete button. There is no warning message for deleting alerts from a patient’s record, so once the Delete button is selected the record will be immediately deleted.
-
Once the add or edit is completed select the Close button to return to the patient’s demographic screen
-
A Show alerts panel and button will now display, highlighted in red, at the bottom of the Actions field, to notify users that there are alerts on this patient