Referrals
Inbound Referrals
A patient’s inbound referral details appear in the Patient Management screen and in the Booking Form screen. Referral details for a patient change regularly due to expiry and change in referring MOs.
A patient can have multiple referrals at a time. All referrals for a patient are stored on the Patient Management screen, although they can be added through many different areas within HealthTrack. A referral should not be modified when a new referral is received, the new referral should be added and the original referral remains on the patient’s record as a non-valid referral.
Adding or Modifying referrals can be completed in HealthTrack where there is a Referral Modify or New In button.

The Add/Modify Referral screen enables you to capture all referrals coming into the practice from referring Doctors or hospitals. HealthTrack provides the ability to import a scanned copy of the original referral into the patient’s file and associate it with the referral.
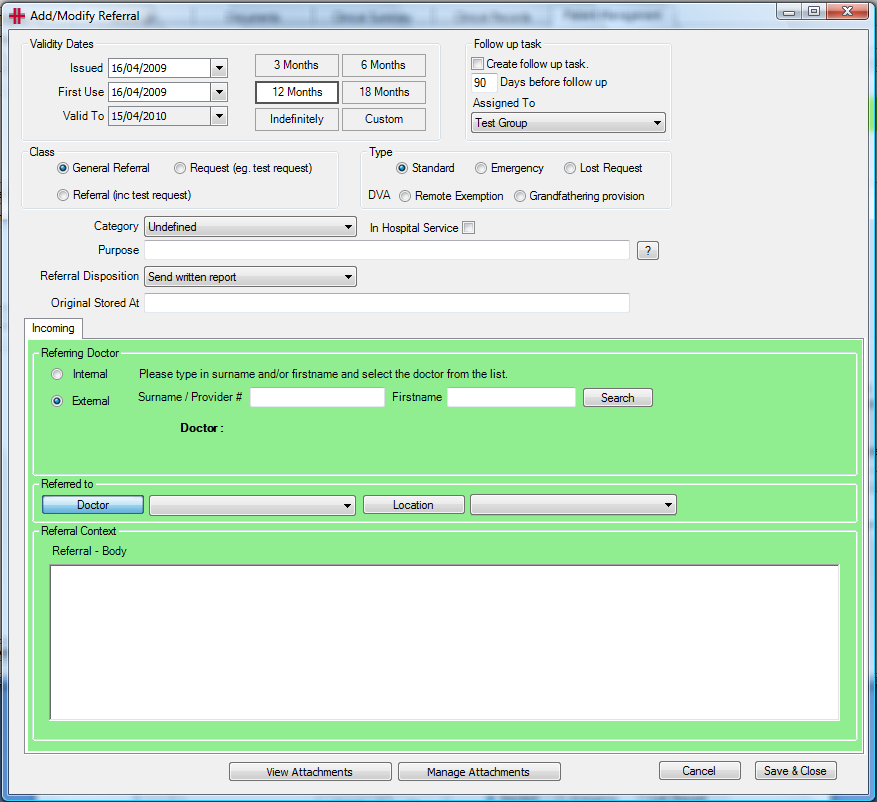
Figure - Incoming Referral
The first section of the Add/Modify Referral screen is for specifying the dates associated with the referral.
Issued – When the referring doctor issued the referral
First Use – The day of the first appointment that relates to the referral
Valid To – By default this is 12 months. To change the referral period select either 3 months, 6 months, 12 months, 18 months or Indefinite and HealthTrack will determine the valid to date for you, based upon the date first used. To set a period that doesn’t match the set options, click the Custom button and the ‘Valid To’ field becomes editable to enter a date.
Follow up task – If required a follow up task can be set for the referral. This task will sit in the Patient Management tab and on the assigned to user’s task list.
Class – Determines whether it is a general referral, a request or a referral including a test request.
Type – Standard, Emergency, Lost Request, Remote Exemption or Grandfathering Provision
In Hospital Service – A referral for any services performed in a hospital. When selecting In Hospital Service a drop-down list appears, to choose the hospital where the service was performed.
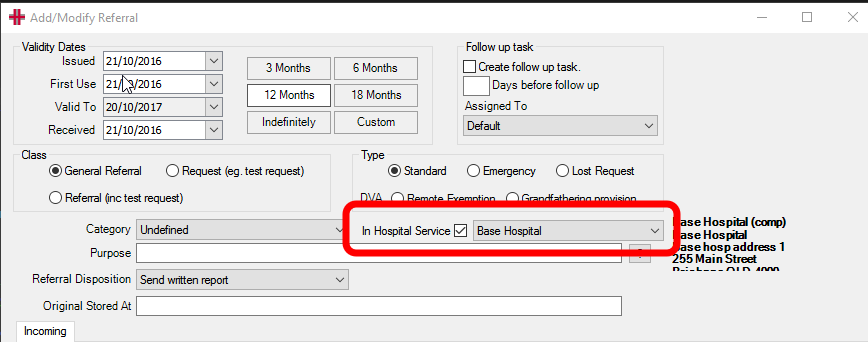 Services referred within a hospital
may be indicated by creating a referral and ticking the ‘In Hospital
Service’ checkbox and selecting a hospital location.
Services referred within a hospital
may be indicated by creating a referral and ticking the ‘In Hospital
Service’ checkbox and selecting a hospital location.
If a referring doctor is selected this will override the ‘In Hospital Service’.
The referral can be placed into a Category by selecting a category from the drop-down menu next to this field. The purpose of the referral can be recorded in Purpose field, and where the original referral is kept can be recorded in the Original Stored At field. The Referral Disposition is to specify the response required back to the referring Doctor e.g. send written report, update care plan etc. Any of these fields can be left blank.
The Referring Doctor section captures who the referral came from. This can either be from another internal Doctor or an external Doctor or hospital. If selecting internal, there is a list of internal Doctors to choose from. Alternatively if selecting external, search for the Doctor’s surname or provider number. Either click Search or hit the enter key twice. The Add/Modify MO Details screen appears with the Doctors matching the search. Select the Doctor from the list, or add a Doctor if required. Once the selection is made and the Add/Modify MO Details screen closed, the selected Doctor’s details will display on the referral.

The Referred to section of the Add/Modify Referral screen is to capture who the referral is addressed to. This can either be an individual Doctor or a location – it cannot be to both. If the referral is for an individual Doctor then use the drop down menu to the right of the Doctor button and select the Doctor. If for a location click the Location button and select the location from the drop-down list.
Documents can be attached to a referral by pressing Manage Attachments .
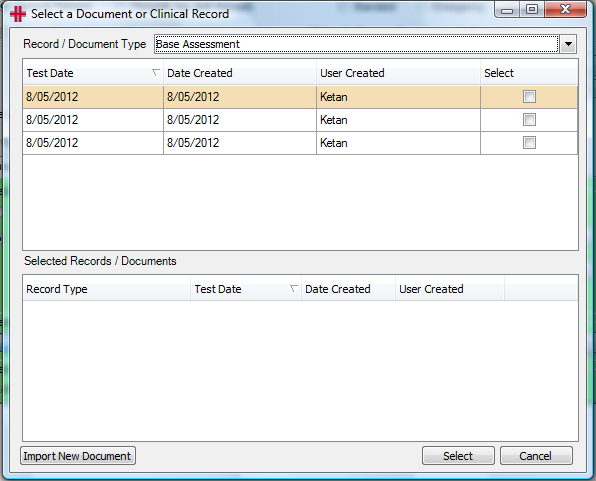
If the attachment has been imported into the patient’s file select it from the list and click Select to add the attachment to the referral. Import New Document enables the user to import a scanned image of the referral into the patient’s Documents tab for reference (see Importing Documents and Images).
The Referral Context section can be used to capture the details of the referral.
Once all required information has been entered press Save & Close . The referral will now appear in the patient’s Patient Management screen and any bookings made for the patient, for as long as the referral is valid.
Tracking Unused Inbound Referrals
Inbound Referrals can be tracked to ensure that all received referrals are addressed. A referral is considered unused if it isn’t attached to a booking or an invoice. To track the Unused Inbound Referrals open the menu Practice Wide >> Unused Inbound Referrals. When first opened the screen will be blank, specify the filters and click Refresh .
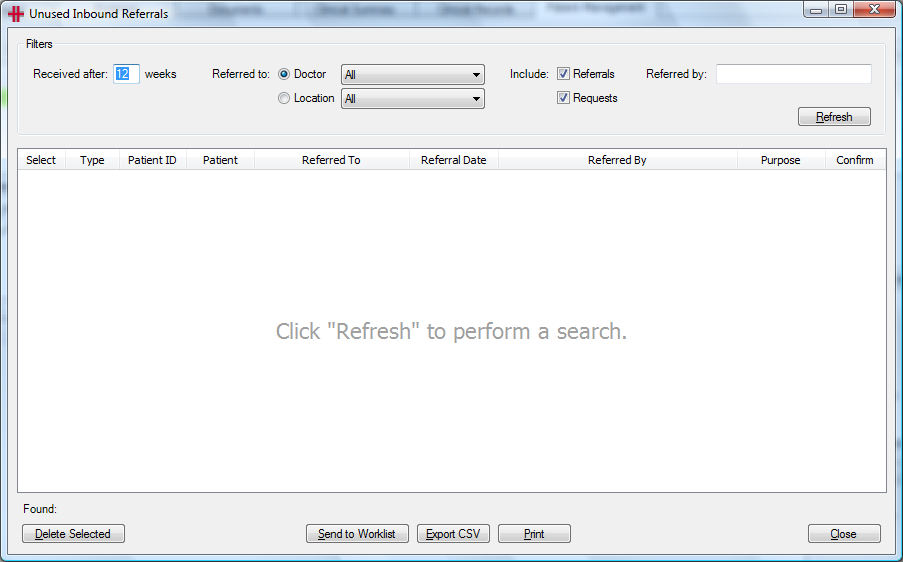
Figure - Unused Inbound Referral Screen
Received after: _ weeks – Specify the number of weeks that the referrals were received after, by default it will be 12.
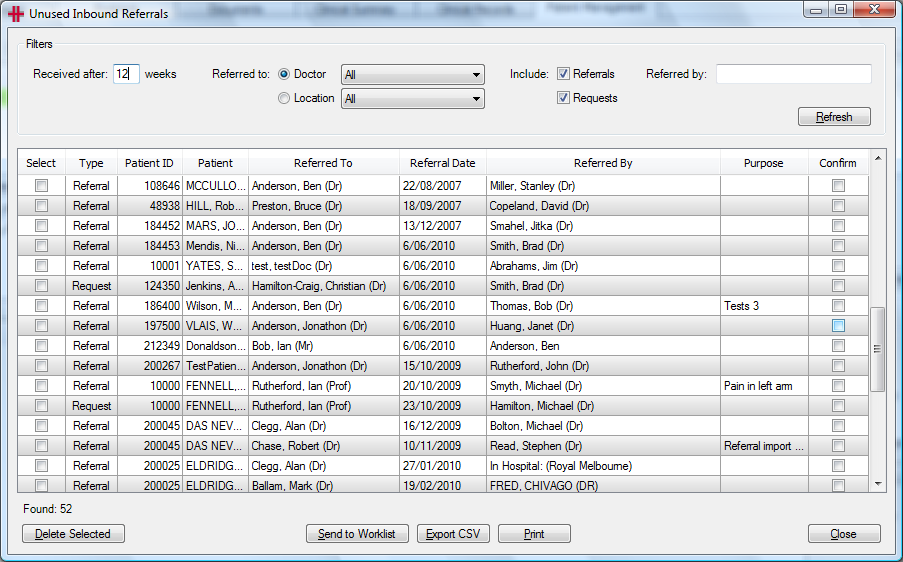
Figure - Results on Unused Inbound Referral Screen
With a list of unused referrals you can:
-
Create a Worklist of patients to review each patient
-
Export to CSV and send out a mail merge letter to either the GPs or the patients
-
Print the list of referrals.
If a patient has been contacted regarding their unused referral, it can be removed from the list in a couple of ways:
-
Assign the referral to a booking or invoice.
-
The referral can be marked as confirmed in the Unused Inbound Referral screen. This will stop the referral from showing the next time the report is run. The referral may be confirmed because you have spoken with the patient and they will not be coming to the practice, but you don’t want to delete the referral from the system.
-
By deleting the referral. To delete the referral tick the ‘Select’ check box for that referral and click the Delete Selected button.
Outbound Referrals
HealthTrack enables a referral to be written for an external Doctor or another internal Doctor or location. If the Outbound Referral is to an internal Doctor or location, an Inbound Referral is created automatically for the inbound service.
Outbound referrals are similar to inbound referrals however the outbound referrals do not show up in bookings or invoicing. They are only displayed on the patient’s Patient Management screen as a record of the services the patient has been referred for. Outbound referrals can be tracked if required.
Outbound Referrals can be created from the Patient Management tab or the Clinical Summary tab.
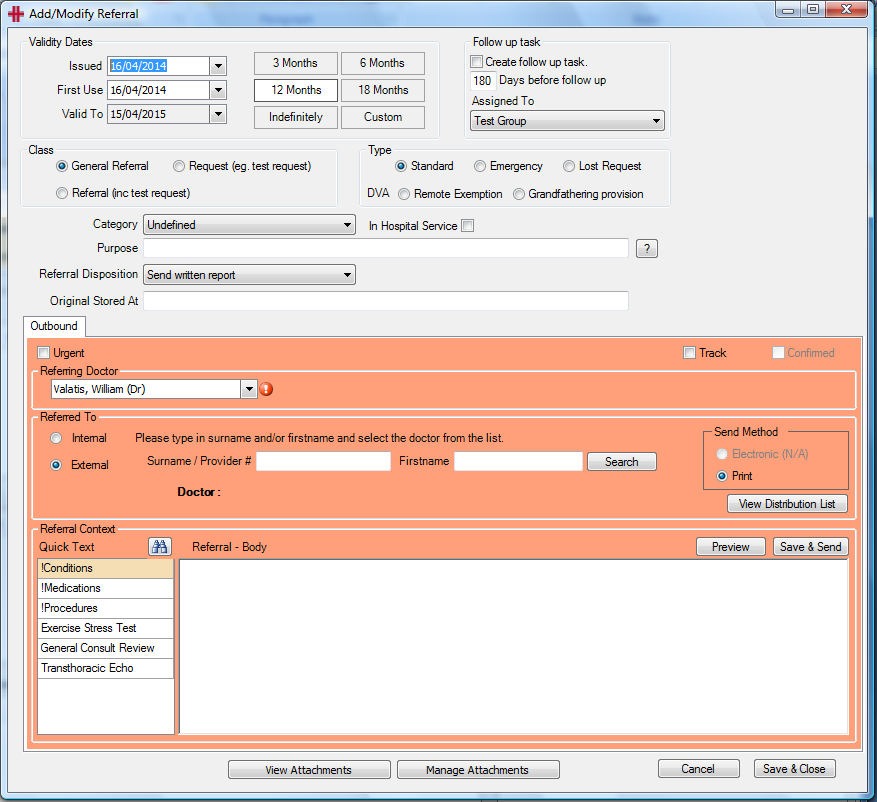
Figure - Outbound Referral
Issued – Date you are issuing the referral.
First Use – Date of the first appointment that relates to this referral
Valid To – By default this is 12 months. To change the referral period click 3 months, 6 months, 12 months, 18 months or Indefinite and HealthTrack will determine the valid to date for you, based upon the date first used. To set a period that doesn’t match the set options, click the Custom button and the ‘Valid To’ field to enter the date.
Follow up task – If required a follow up task can be set for the referral. This task will sit in the Patient Management tab and on the assigned to user’s task list.
Class – Determines whether it is a general referral, a request or a referral including a test request.
Type – Standard, Emergency, Lost Request, Remote Exemption or Grandfathering Provision
In Hospital Service – A referral for any services performed in a hospital. When selecting In Hospital Service a drop-down list appears, to choose the hospital where the service was performed.
The referral can be placed into a Category by selecting a category from the drop-down menu next to this field. The purpose of the referral can be recorded in the Purpose field, and where the original referral is kept can be recorded in the Original Stored At field. The Referral Disposition is to specify the response required back to the referring Doctor e.g. send written report, update care plan etc. Any of these fields can be left blank.
Referring Doctor – Defaults to the Doctor logged on. If this is not correct change it to the correct Doctor Referred to. This can be an internal Doctor or an external Doctor or hospital. If selecting internal there is a list of Internal Doctors or Locations to choose from.

Alternatively, if selecting external, search for the Doctor’s surname or provider number. Enter the search terms and either click Search or hit the enter key twice. The Add/Modify MO Details screen appears with the Doctors matching the search. Select the Doctor from the list, or add a Doctor if required. Once the selection is made and the Add/Modify MO Details screen is closed, the selected Doctor and their details will display on the referral.

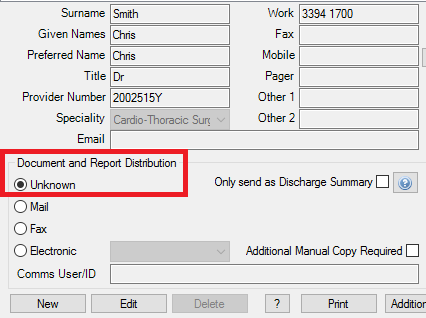
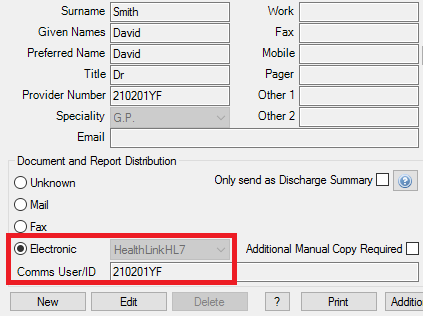
The Send Method populates dynamically from the Referring Doctor’s Add/Modify MO Details screen. If there is a Document and Report Distribution method configured, this will display or if there is no method configured the selection will default to print.
Scenario 1 – No Document and Report Distribution method configured

Scenario 2 – Document and Report Distribution method configured

Referral Context is for entering the content of the referral – why you are sending this patient to the Doctor and any other details that they need to know. Or alternatively Quick Text can be set up and used to assist in writing the referrals. The Medication, Procedures and Condition tags populate the body of the referral with all current information. Once all text is entered click Preview or Save & Send . If using a distribution system and the Doctor receives electronic correspondence, then it will be sent electronically, or flagged for printing.
Documents can be attached to a referral by pressing Manage Attachments . If the attachment has been imported into the patient’s file, select it from the list and click Select to add the attachment to the referral. Import New Document enables the user to import a scanned image of the referral into the patient’s Documents tab for reference (see Importing Documents and Images).
Alternatively, if requesting a Test for the patient (internal or external) you could use the Requests Form. For any requests made to an internal location an inbound referral will be automatically created ready for the booking and invoice.
Tracking Outbound Referrals
Outbound referrals marked as requiring tracking can be monitored in the Outstanding Requests screen. This screen is accessed by clicking the Outstanding button in the Clinical Summary tab or the Requests form.
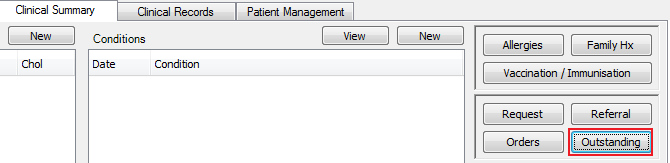

The Outstanding Request screen incorporates: Outbound Referrals, Pathology Requests, Radiology Requests and Other Test Requests. The user can filter on one, many or all types.
Outstanding requests can be based on either the requesting Doctor or the patient. When viewing outstanding requests for a Doctor or all Doctors, all patients are shown. When searching for outstanding requests for one patient all requesting Doctors’ outstanding requests are displayed.
At the top of the Outstanding Outbound Requests screen click either the Doctor or the Patient button.
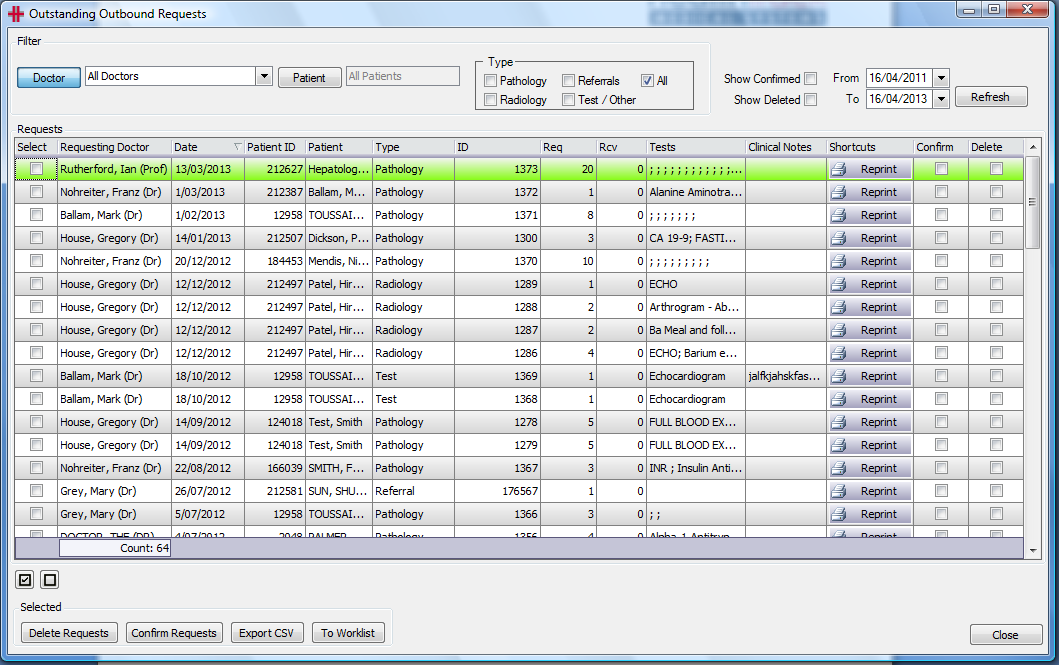
Figure - Outstanding Requests – Doctor
All requests matching the filters are listed in the table. From here you can select one or more referrals and complete the following:
-
Reprint a referral or request using the Reprint button
-
Confirm a request has been completed
-
Delete the referral or request using the Confirm and Delete check boxes
-
Create and export to a csv file
-
Send patients To Worklist
The referrals/requests marked as completed or deleted can be viewed at any time by clicking the ‘Show Confirmed’ or ‘Show Deleted’ checkboxes.
Referrer Tracking
The Referrer Tracking module is accessed from the Admin menu >> Referrer Tracking.
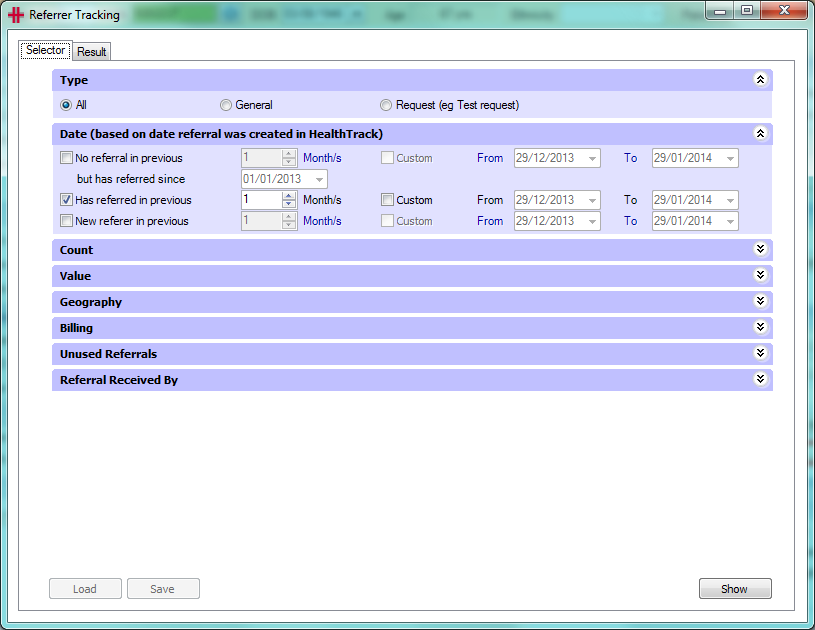
Each section contains filters that can be used to conduct a search of the Referring Doctors in your HealthTrack system.
Select the filters, and change the date ranges to the period required. When ready click the Show button and a list of the Referring Doctors that meet the search criteria will be displayed in the Result tab, for example:
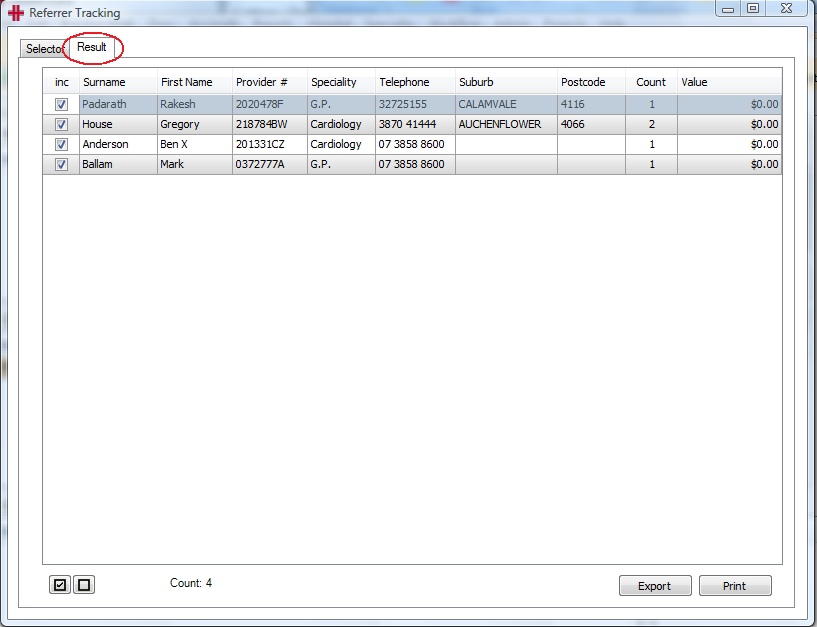
The list can be sorted by clicking on any of the column headings. To save or print a copy of list, click the Export or the Print button. If the whole list is not required, untick the Doctors to exclude from the export or print out.