Questionnaire
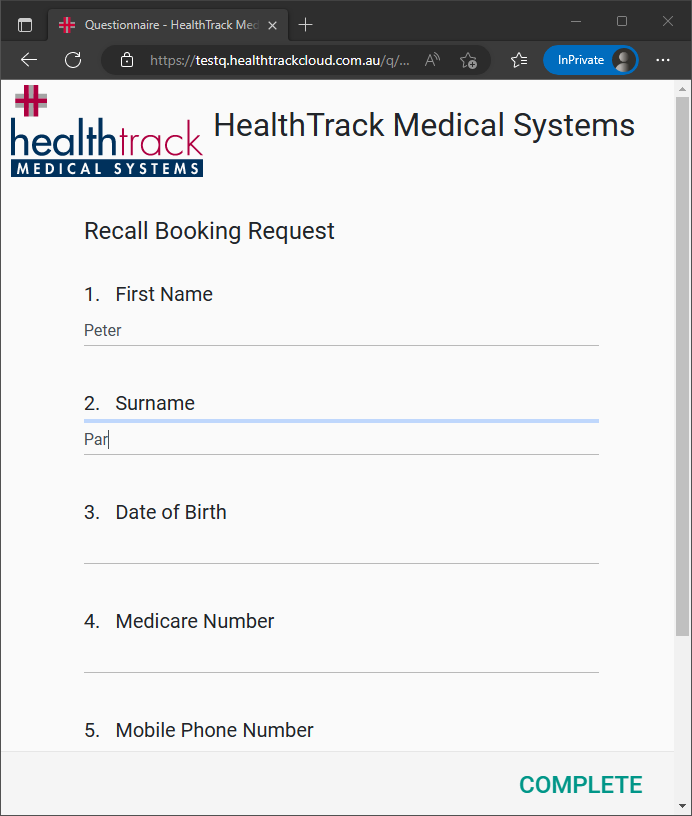
The Questionnaire functionality allows you to create customised data capture forms for patients to complete. It supports a variety of question types and can also allow the upload of images or other documents. Example Questionnaire:
Sending Questionnaires
All Immediate Questionnaires will be associated with an existing patient, and an individualised URL can be sent using SMS or Email via the Demographic page, or included in booking reminders.
-
From the Demographic tab, click the Questionnaire button from the buttons on the right-hand side.
-
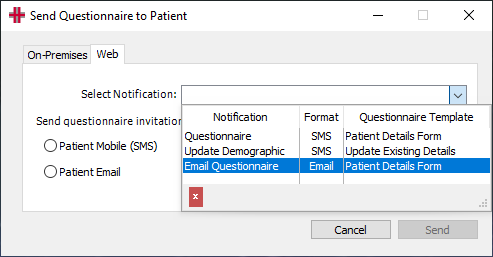
Select the Web tab.
-
Choose whether the questionnaire will be sent as an SMS or Email. If these have been recorded in the Demographic tab, the patient’s details will populate automatically.
-
From the Select Notification drop-down, choose the message template you would like to send.
-
Choose the Send button.
-
You should receive a prompt to advise the questionnaire notification has been created; select the OK button.
As the Booking Request Questionnaires do not need to be associated with a patient, the same URL can be used repeatedly, and can even be included on your clinic’s website.
Templates for Immediate Questionnaire
For more information on setting up templates, please see the Notification Manager section.
If a template is being configured exclusively for sending a Questionnaire, you do not need to include any rules on your messages.
In order for a template to be available for sending via the Demographic tab, it will require a Questionnaire Invite tag to be inserted.
-
Navigate to Admin > Notifications & Messages > Notification Manager.
-
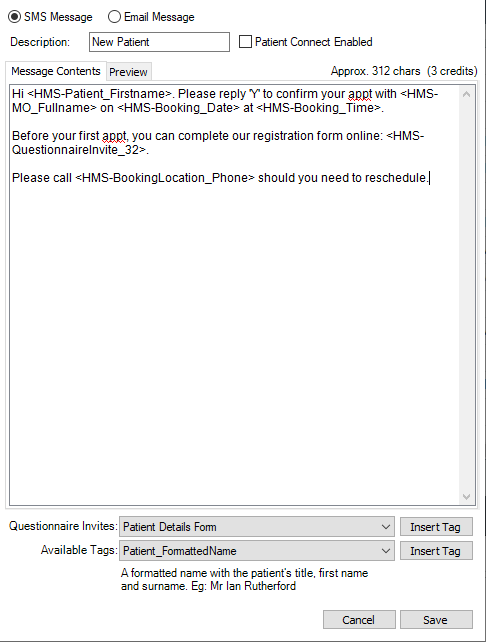
Select a message template in the top left and choose the Edit button.
-
In the bottom right, choose a questionnaire from the Questionnaire Invites drop-down.
-
Choose the Insert Tag button to place the relevant tag in the message.
-
Select the Save button in the bottom right.
After adding the relevant tag, the message template will be available to send from the Demographic screen. Once the tag is added, a link to the Questionnaire will also be included in any automated messages such as booking reminders.
Security / Pin Code
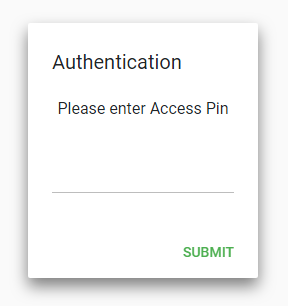
A Pin can be enabled for Immediate class Questionnaires in Admin > Questionnaire Management by ticking the Use Pin Security option. When this is enabled, the patient will receive a code in their SMS/Email, and will be prompted to input the Pin before accessing the Questionnaire. This option is required when the Prefill Data option is enabled.
For Booking Request class Questionnaires, the patient will receive an SMS or Email to verify their contact information if their completed Questionnaire is unable to be matched to an existing patient in HealthTrack. From the SMS/Email received, they will be asked to click a link to verify their mobile phone number or email address, which ensures the correct details have been submitted in the Booking Request. The patient’s response will not be available in HealthTrack until the verification has been completed.
This can be disabled in Admin > Questionnaire Management by ticking the option for Bypass SMS/Email Verification, however doing so may make contacting a new patient harder if they have entered their contact information incorrectly.
On-Premises Questionnaires
For Questionnaires that have been enabled for use on premises, the patient can access the Questionnaire using a practice-owned device that is connected to the practice network.
Once this functionality has been set up, you will be provided with a URL that can be saved on the device/s used for accessing the Questionnaire by patients. The same URL will be used for all On-Premises Questionnaires. Please see the Configuring On-Premises Questionnaires section for setup instructions.
-
From the Demographic tab, click the Questionnaire button from the buttons on the right-hand side.
-
Select the On-Premises tab.
-
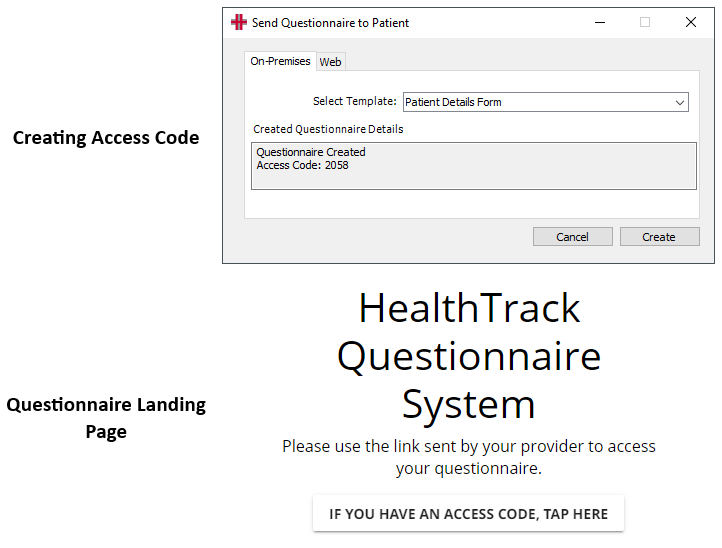
From the Select Template drop-down, choose the Questionnaire to be completed.
-
Choose the Create button.
-
The Send Questionnaire to Patient window will display a 4-number access code, which will be entered on the device.
-
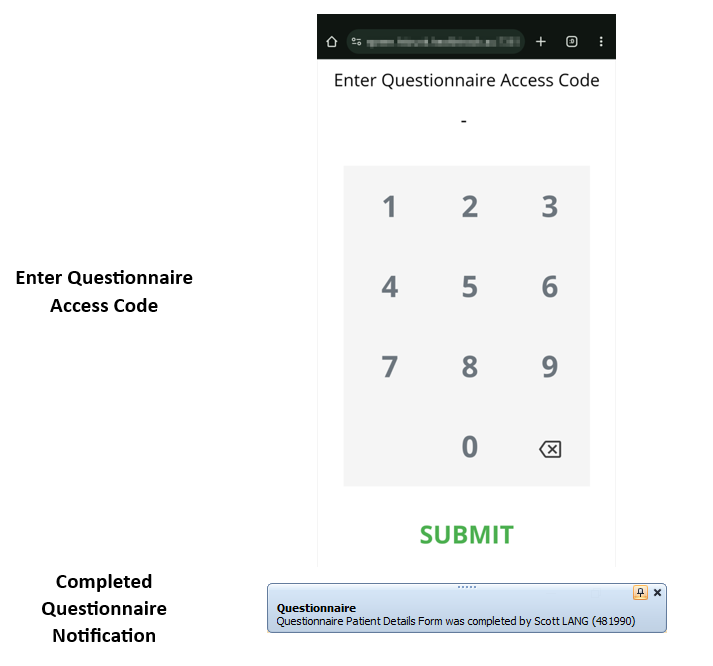
On the device, the saved URL can be used to access the Questionnaire. Enter the Access Code and choose the Submit button. This access code will determine the patient and which Questionnaire template to use.
-
Once the code is entered, the Send Questionnaire to Patient window can be closed in HealthTrack.
-
-
When the patient has completed the Questionnaire, the same user that initiated the Questionnaire will receive a notification in the top right of their screen to advise the submission has been received.
- Upon completing the Questionnaire, the URL will return to the Enter Questionnaire Access Code screen, ready for the next patient.
Questionnaire Management
For information on creating and managing the available Questionnaires, please see the Questionnaire Management section.
Patient Submissions
When a patient has completed their Questionnaire, a new note will be created in the Discussions tab of their record. This note will include the title of the completed Questionnaire, the date/time the response was received, and the number of attachments submitted with the Questionnaire.

Questionnaire Review (Class: Immediate)
When configuring a Questionnaire with an Immediate class, users can choose the Requires Review option to ensure any response received in HealthTrack is viewed before being saved to the patient’s documents.
When this option is enabled, responses can be accessed in Practice Wide > Questionnaire Review. If this is not enabled, the patient’s responses will be saved directly to their Documents tab, in the Save To folder nominated for the Questionnaire during configuration.
All Questionnaires requiring review will be available in the list on the left-hand side of the screen, and can be filtered by Class, Questionnaire, and Location as necessary.
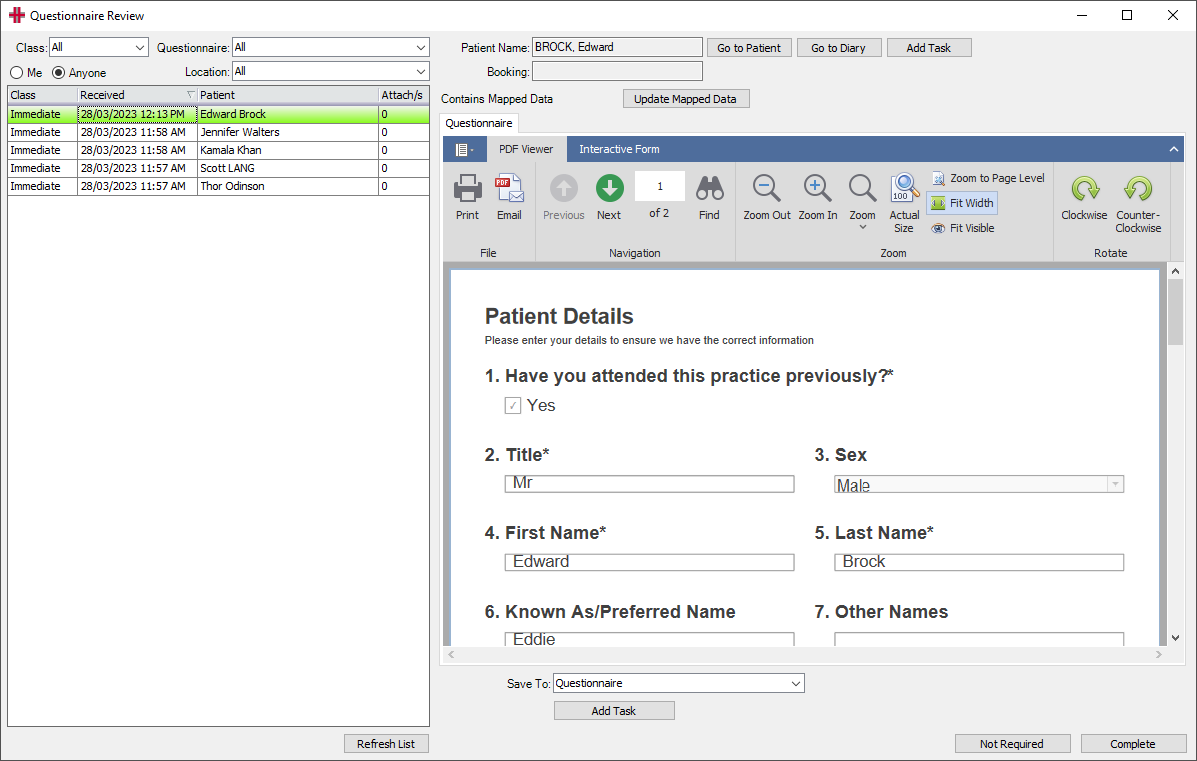
Once a Questionnaire has been selected from the left, several actions can be performed from the top right.
Go to Patient – this button will open the Demographic screen for the matched patient.
Go to Diary – this button will open the Diary.
Add Task – this button allows a new task to be created, which will be linked to the patient.
Update Mapped Data – this button can be used to update the patient’s Demographic screen with details entered in the Questionnaire.
Details of the patient’s booking will also be referenced at the top of the screen if a Questionnaire was sent to the patient within an SMS/Email Booking Reminder.
At the bottom of the screen, the following options are available:
Complete – this button will become active once all attachments have been actioned, and will save a PDF of the patient’s responses to the nominated Save To folder.
Not Required – this button can be used to clear the Questionnaire from the Questionnaire Review screen if no information needs to be saved from the patient’s response.
Add Task – this button will open a New Task screen, which will be linked to the patient and the PDF copy of the patient’s responses.
Amend – this button can be used if the Questionnaire was marked as Not Required or Complete in error. This option is only available while the Questionnaire Review window remains open.
Update Mapped Data
If your Questionnaire has any Reference IDs included in the configuration, the responses from patients can be used to update the details of their Demographic screen. Reference IDs can be included on most question types when configuring the Questionnaire in Properties > Others > Reference ID.
-
Navigate to Practice Wide > Questionnaire Review.
-
Select a patient’s response from the list on the left.
-
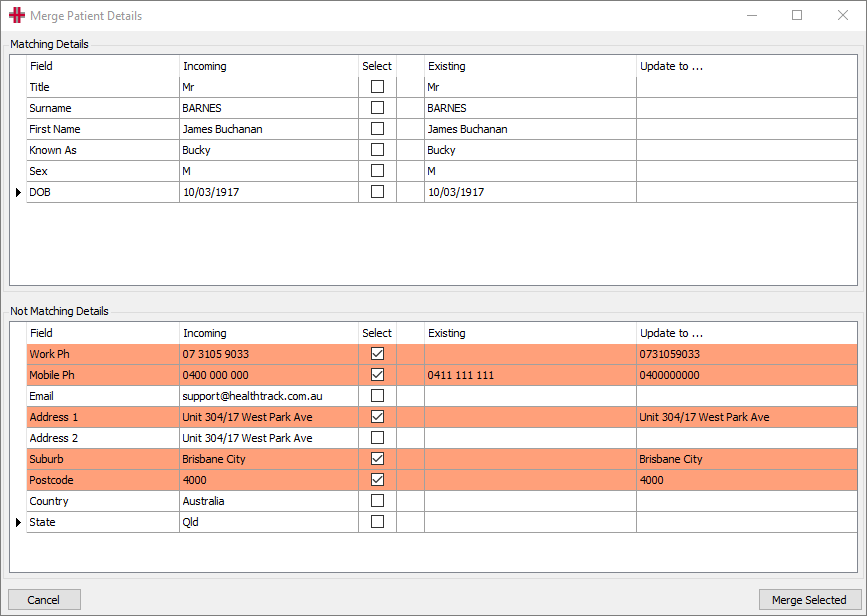
Select the Update Mapped Data button at the top of the screen to open the Merge Patient Details screen.
-
At the top of the screen will be the Matching Details, in which the patient’s responses match what is already available in the Demographic screen.
-
At the bottom of the screen will be the Not Matching Details, in which the patient’s responses are different than what is in the Demographic screen.
-
For any details that are to be updated, choose the tick box in the Select column.
-
Any changes to the layout of the submitted data can be done in the Update to… column before merging.
-
-
Select the Merge Selected button. The nominated details will be updated in the Demographic screen for the patient.
If your Questionnaire has the option for Automatically Apply Mapped Data enabled, you will not have the option to choose what details are being updated. Instead, any data submitted by the patient will be automatically updated in the Demographic screen. This cannot be undone.
Attachments
A Questionnaire may be configured to allow patients to upload files, such as a referral or recent results. When the Requires Review option is enabled, any files uploaded by the patient can be reviewed in Practice Wide > Questionnaire Review.
-
Navigate to Practice Wide > Questionnaire Review.
-
Select a patient’s response from the list on the left.
-
If any files have been uploaded by the patient, these will appear as individual tabs above the preview of the patient’s completed Questionnaire.
-
Select a tab to see the attachment contents.
Below the attachment preview are a number of actions that can be performed.
Save – this button will open the Classify Document screen to save the current attachment to nominated folder.
Save All – this button will open the Classify Document screen and all attachments will be saved with the same options.
Mark as Not Required – any files that are not deemed relevant can be marked as not required, rather than being saved to the patient’s Documents.
Save as Referral – after the Classify screen, the user will be prompted with the Add/Modify Referral screen to enter the details of the uploaded referral.
After processing any attachments, the following icons will appear to indicate whether the item was saved or marked as not required:
-
A ✅ for attachments which have been saved will appear in the tab title
-
A ❌ for attachments which have been discarded will appear in the tab title

When configuring a Questionnaire, you can choose the default folder to be used for each file upload question. The default folder for each folder upload can be set in Properties > Others > HMS Document.
Triage (Class: Booking Request)
All responses for Booking Request Questionnaires will be received in Practice Wide > Triage. In this screen, a new configuration will be available in the top left for All Booking Requests, which can be used to view patient responses.
When a Booking Request is received, HealthTrack will match to an existing patient where possible, or create a new patient. The new patient will have a number of details populated based on the Reference IDs included in the Questionnaire. The following Reference IDs are required in order to create a Booking Request Questionnaire.
-
Given name
-
Family name
-
Mobile phone number
-
Email address
-
Date of birth
The patient may also receive an SMS/Email containing a link to verify their contact details before their response is made available in HealthTrack. If their details are not verified within 7 days, any data entered will be deleted.
For more information, please see the Triage section of this manual.
New Patients
If a new patient is created from a Booking Request, the patient will be marked as deleted. The new patient’s record will automatically include the following details, if entered on the Questionnaire:
-
Given name
-
Family name
-
Mobile phone number
-
Home phone number
-
Email address
-
Date of birth
-
Medicare number
-
Medicare reference number
This patient will be un-deleted after creating a booking from the Triage screen.
-
Navigate to Practice Wide > Triage and sign in as needed.
-
From the All Booking Requests configuration, double-click on an entry.
-
Nominate any details for the Location, Purpose, Date, Time, and Actual MO.
-
Choose the Schedule to Diary button to open the Diary.
-
From the Move List on the left-hand side, select the patient to be scheduled.
-
Select an available booking slot in the Diary.
-
From the Move List, select the => button to create the booking in the selected slot.
After saving the new booking, the Diary and Triage entry will close.
HealthTrack will attempt to match the Booking Request to an existing patient based on the following details:
-
Given name
-
Family name
-
Medicare number
-
Home phone
-
Work phone
-
Date of birth
If the completed Questionnaire can be matched to an existing patient, none of the patient’s existing information will be replaced by responses from the Questionnaire.
From a Triage entry, you can use the Change Patient button to select a different patient that the Triage entry relates to.
Questionnaire Listing
In HealthTrack D4.4.8, the Questionnaire Listing screen was introduced. This screen displays a list of all “Immediate” Questionnaires sent, and both the “Immediate” and “Booking Request” Questionnaire responses that are received. This screen can be accessed through Practice Wide > Questionnaire Listing.
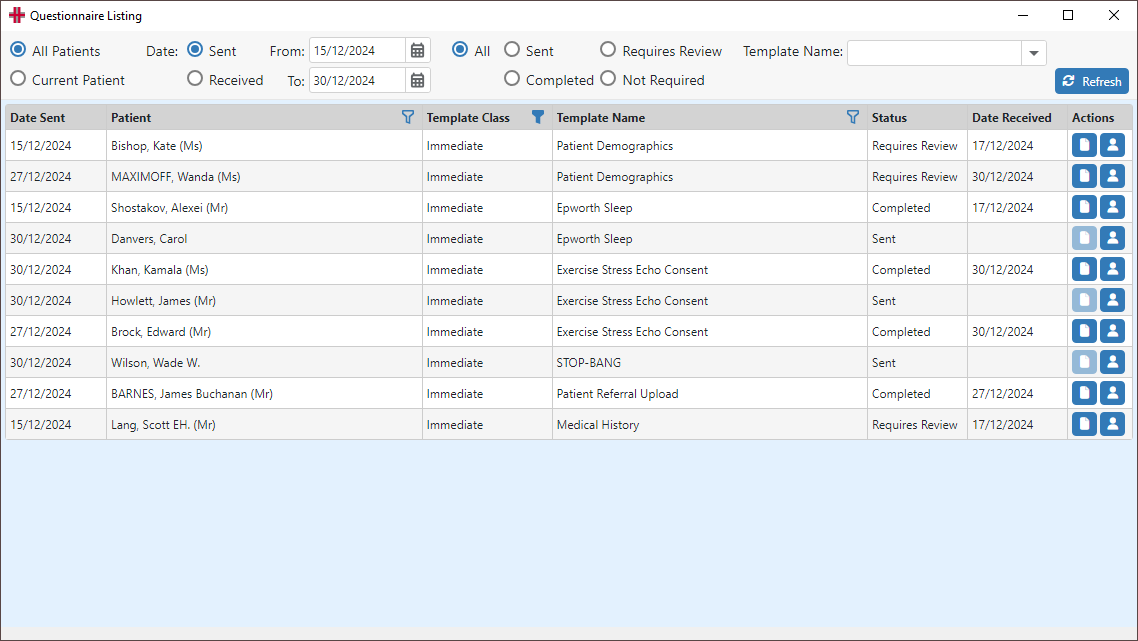
At the top of the Questionnaire Listing screen, a number of filters can be set.
| All Patients | This is the default selection, and ensures Questionnaires are listed for all patients. This may include patients created from a Booking Request, who may not have an active record until processed via the Triage screen. |
|---|---|
| Current Patient | This option filters the Questionnaire Listing screen to only show the patient currently in use. |
| Date Sent | This option allows you to filter the results to show Questionnaires sent within a nominated date range. By default, Questionnaires sent within the last month are displayed. |
| Date Received | This option allows you to filter the results to show Questionnaire responses received within a nominated date range. By default, Questionnaires received within the last month are displayed. |
| All, Sent, Requires Review, Completed, Not Required | These options can be used to identify Questionnaires in a particular status. |
| Template Name | This drop-down can be used to select a specific template. |
| Refresh | The Refresh button can be used to populate newly sent/received Questionnaires and to display the latest Status of existing records. |
Unavailable Questionnaires
There are a number of reasons a patient may encounter a message that “This questionnaire can no longer be viewed.”

-
The patient has already completed their Immediate Questionnaire, and cannot submit another response unless issued a new URL.
-
The Immediate Questionnaire can be configured to be available for a specific number of days for the patient to complete. If the Questionnaire is not completed in this time frame, the URL will expire and can no longer be completed.