Triage
Triage Overview
The Triage system is a licensed feature that allows a department or practice to queue and prioritise patients before scheduling the patient via a Booking in the HealthTrack diary.
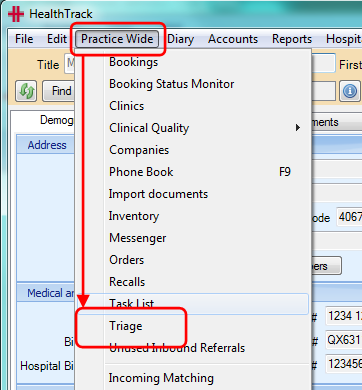
The Triage System is accessed from the ‘Practice Wide Menu’
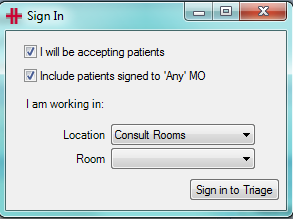
This will open the ‘Sign in Window.
-
Doctors signing in to the Triage System will select one or both of the following tick options:
-
“I will be accepting patients” – When doctor selects a Triage patient from the Triage List, the system will automatically
-
create a patient booking based on the ‘Sign In’ ‘Location’ and ‘Room’, and set the booking doctor to the logged-on doctor. The booking will be placed ‘In Session’.
-
Switch to the patient in HealthTrack, and remove the triage entry.
-
-
“Include Patients signed to ‘Any’ MO” – The doctors Triage List will include patients Triage entries that have been preassigned to the doctor and those that have no doctor assigned.
-
-
Admin staff ‘Sign In’ to manage and add new patients to the Triage System should ensure the options are un-ticked
Admin staff:
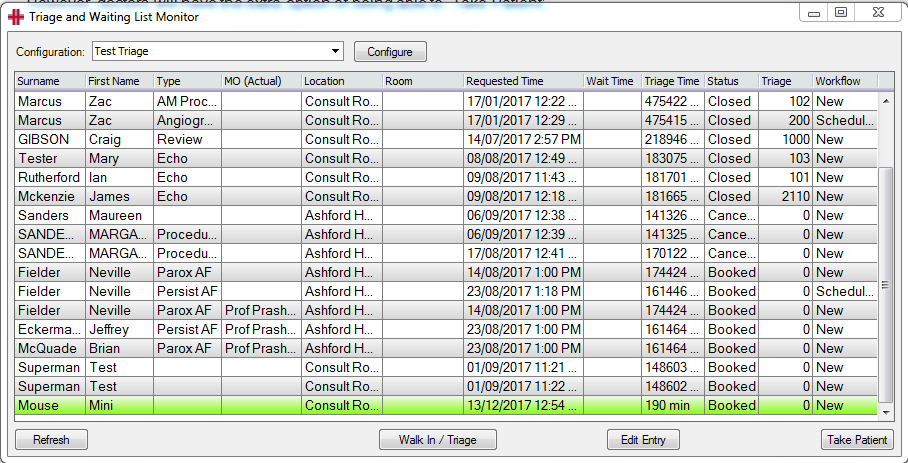
Once the ‘Triage and Waiting List Monitor’ window is open, the screen will display all Triaged patient entries, based on the selected ‘Configuration’ drop down.
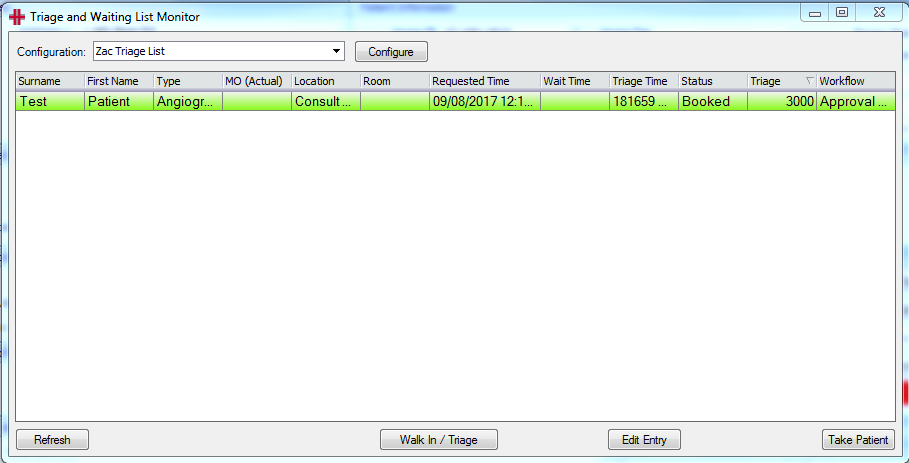
To add a patient to the Triage List, click on the Walk In / Triage button to open the HealthTrack ‘Find Patient’ window.
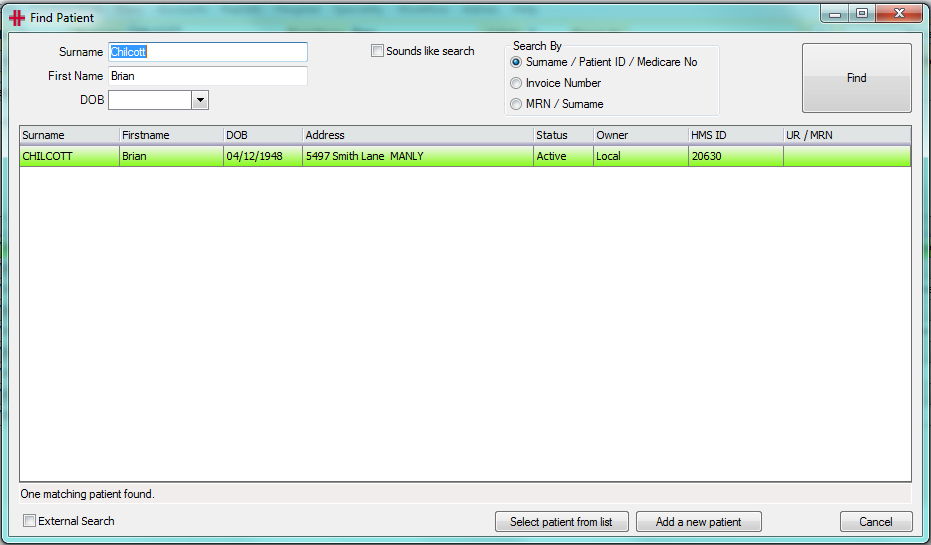
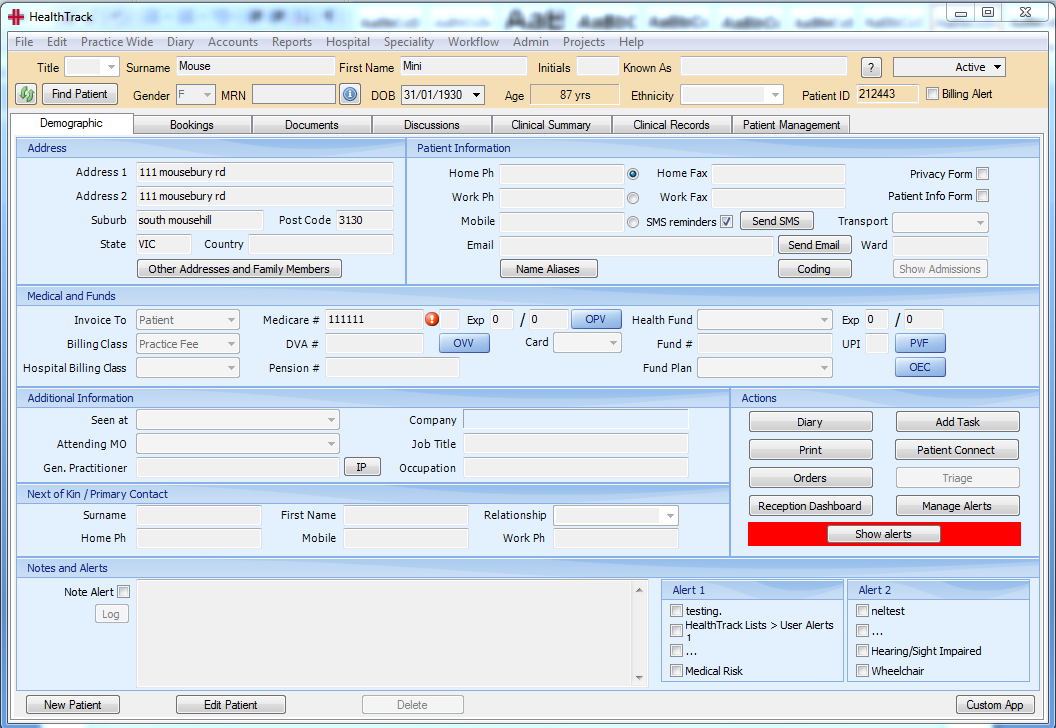
Find and select the Patient that you wish to Triage. Selecting the patient will open the ‘Triage’ window for you to fill in all the patient’s request details including ‘Purpose’ which is a required field.
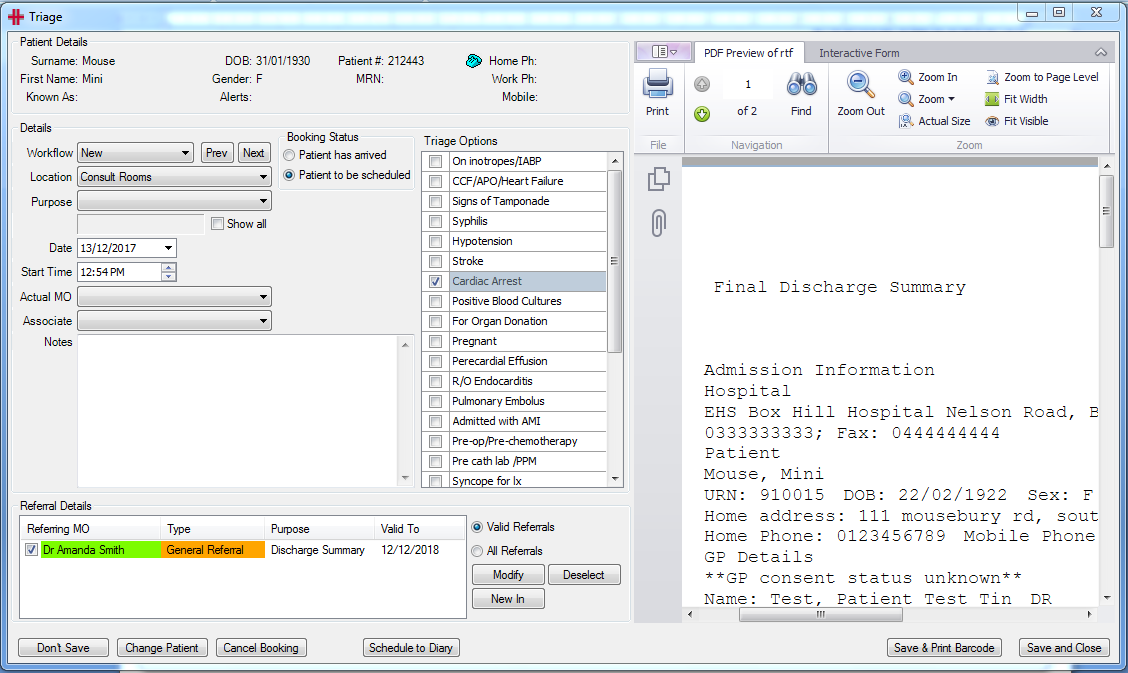
Once you have filled in all the necessary booking details click ‘Save and Close’ and the patient will be added to the Triage List.
To edit a Triage entry for a patient, open the ‘Triage and Waiting List Monitor’ window, highlight the Triage entry and click the Edit Entry or double click the Triage entry. This will open the patient’s Triage entry screen for update.
Details that user may wish to edit and change:
-
Change the patient if the wrong patient has been selected (click on ‘Change Patient’ button)
-
To Cancel Booking
-
To Schedule to Diary
-
To add or modify the referral or booking details
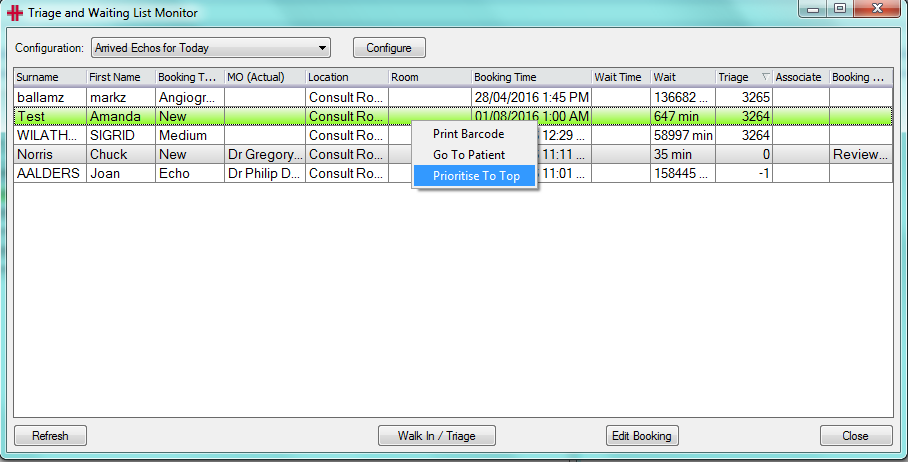
Other functionality supported in the ‘Triage and Waiting List Monitor’ screen:
-
Right-click option to ‘Prioritise to the top’.
-
‘Drag & Drop support to prioritise triage entries higher or lower.
Doctors:
Once the ‘Triage and Waiting List Monitor’ window is open, the screen will display all Triaged patient entries, based on the selected ‘Configuration’ drop down.
Doctors can perform all functions of ‘Admin Staff’ such as adding a patient to the Triage List.
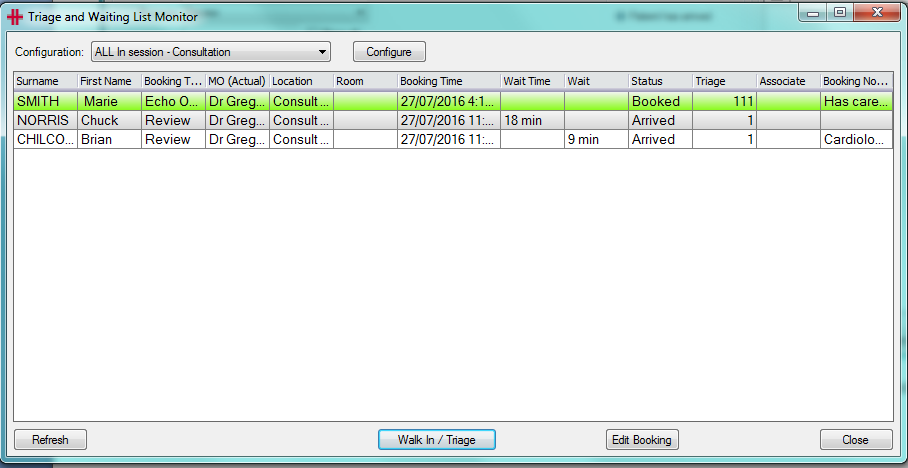
However, doctors will have the extra option of being able to ‘Take Patient’.
The doctor can select the patient that they wish to consult / test and click on the ‘Take patient’ button. This will convert the triage entry into a new diary booking and set the status to ‘In Session’. The doctor will also have HealthTrack switch directly to the patient so they can immediately view their medical records. Finally, the triage entry is removed from the ‘Triage and Waiting List Monitor’ since the patient is now being seen.
Triage Set-up and Configuration
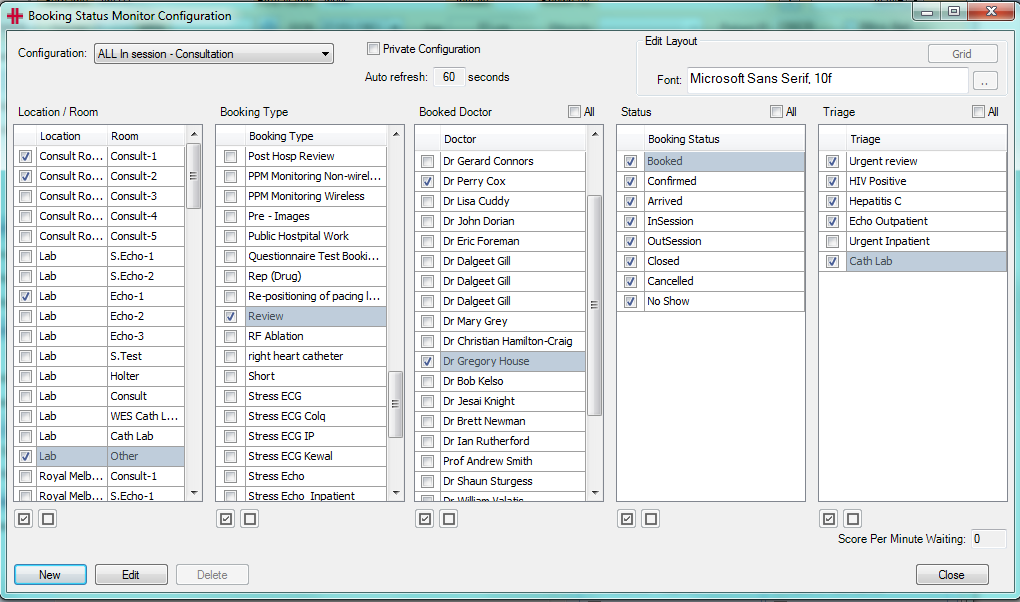
In ‘Triage and Waiting List Monitor’, Click on the ‘Configure’ button to open ‘Booking Status Monitor Configuration’ window.
A configuration allows you customise which patients and triage bookings you’re interested in. It may be for triage bookings for Echocardiograms in the ward that you work in but not another hospital across the road, for example. A different configuration could be for ECGs for the hospital across the road so their nurses and techs can easily bring up their ‘to do’ list. The configurations can also customise what information you would like to have viewed on the screen, whether it be the location, the room, the doctor or even the patient’s triage score.

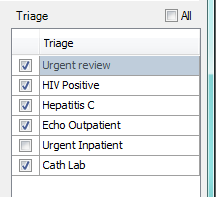
Use tick box options to select configuration.
-
Tick-boxes can either all be selected or de-selected depending on where you work, which booking type you’d like to pick patients up for, etc. The ‘All’ tick-box could be used to say “I want to see all locations” even when new locations are created in the future. The ‘Auto refresh’ setting below will auto refresh the ‘Triage Waiting List Monitor’ screen and move patients up the waiting list according to how long they have been waiting.
-
Patients can be given an added waiting score according to how long the have been on the waiting list, and a ‘Score Per Minute Waiting’ value can be set so the longer they wait the higher the priority is for you to see them.
-
The ‘Private Configuration’ tick box will restrict this configuration to just you.
Note: Triage options are configured from the HealthTrack ‘List Manager’ under the ‘Admin Menu’. They are used to give patients an initial weighted score so that patients with a higher triage score (i.e. emergencies) will automatically be added higher up the list when they are triaged.
Go to Admin Menu >> List Manager >> List Category / HealthTrack Lists & List Name / Triage Configuration.
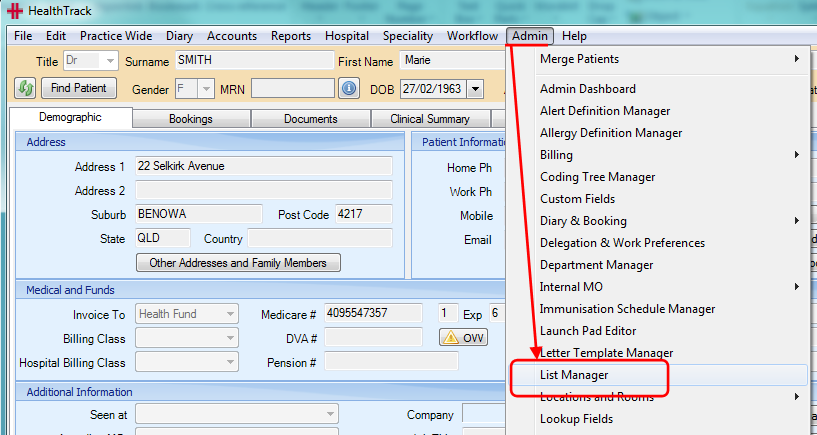
Note: Items on the list can be given a ‘weighted score’ of between zero (0) and 1000 to move bookings up the Triage List.
Triage Grid Configuration
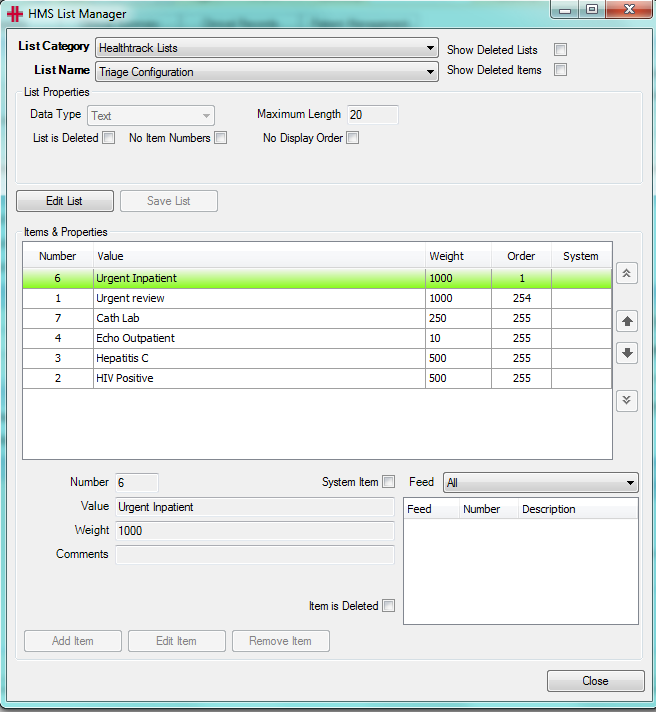
The columns displayed in the ‘Triage and Waiting List Monitor’ window can be configured by clicking on the ‘Grid’ button in the ‘Booking Status Monitor Configuration’ window.

Clicking on the ‘Grid’ button will open the ‘Booking Status Monitor Config Layout’ screen shown below, and allows the user to select the columns to be shown on the ‘Triage and Waiting List Monitor’ screen.
Clicking on the
 button allows the
user to set the font, font style and lettering size that will be
displayed on the ‘Triage and Waiting List Monitor’ screen
button allows the
user to set the font, font style and lettering size that will be
displayed on the ‘Triage and Waiting List Monitor’ screen
This is so that if the ‘Triage and Waiting List Monitor’ screen is displayed on an overhead monitor within the department for all to see the lettering and font size can be adjusted to make it easy to read.