Whisper Messenger
Whisper Messenger is HealthTrack’s new instant messaging feature, improving the previous Messenger and Arrival systems. It facilitates seamless communication across various channels and user groups, enhancing team collaboration and streamlining practice workflows.
Accessing Whisper Messenger: Navigate to Practice Wide > Whisper Messenger.
Types of Channels:
-
Alert Notifications: Alerts are for system wide alerts intended for every user, such as shutdown notifications.
-
Arrival Notifications: Notification messages will be sent to the corresponding staff when Bookings are updated to the Arrived status, if the staff member is configured to receive arrival messages.
-
Individual Conversations: One-on-one messaging. You can view the recipient’s details, such as their email and mobile number, by clicking the ? button in the top right corner.
-
Group Conversations: Communicate with all users in a predefined group (e.g. all doctors or managers). These groups are set up in Admin > Security > Security & Permissions.
-
Custom Group Conversations: Create custom groups with any combination of users, security groups, or other message groups. New members added to the group will receive full conversation history, while removed members lose access to the conversation and its history.
Creating a New Conversation and Sending a Message
|
|
-
Click the New button in the top left corner or use the keyboard shortcut CTRL + K.
-
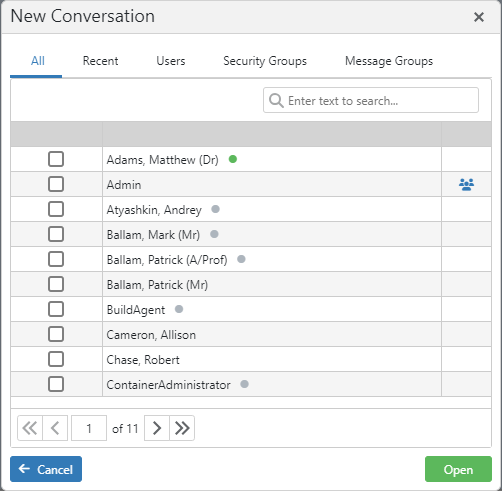
In the New Conversation screen, you can use the search bar to filter users by their name. Double-click a user or an existing group to open the new conversation.
-
To select multiple users or groups, tick the checkboxes next to the relevant user or group names then the Open button.
-
In the newly opened conversation, type your message in the reply box and press the Enter key on your keyboard, or click the send button to the right.

|
This icon indicates a Group Conversation |
|---|---|

|
This icon indicates a Custom Group Conversation |
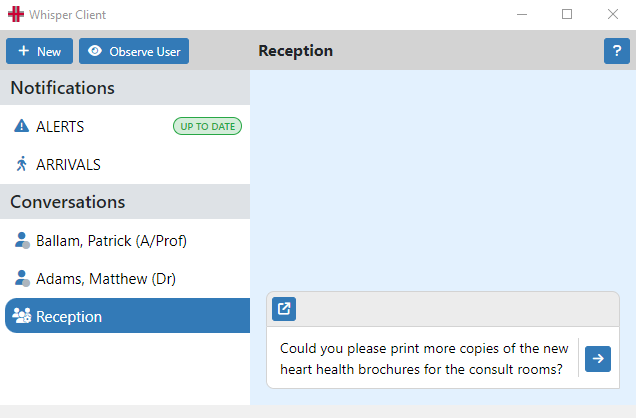
Conversations will remain visible on the left-hand side of the screen. If the conversation contains unread messages, it will remain visible indefinitely. Once the messages are read, the conversations will no longer appear after 3 days of inactivity, however the conversation history is retained and is available when opening a new conversation.
Editing a Message Group
-
Select the conversation from the Channel Selection Menu on the left.
-
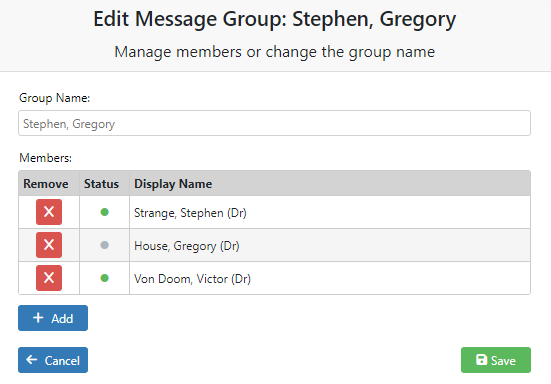
Click the ? button to rename the group or add/remove users, security groups, or message groups.
-
To remove users/groups, click the X button next to their name. To add new members, click + Add and select from the list, then press the Confirm button.
-
Click Save to apply the changes.
Send a Message as an SMS
-
Select the individual conversation from the Channel Selection Menu.
-
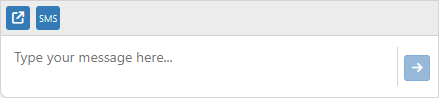
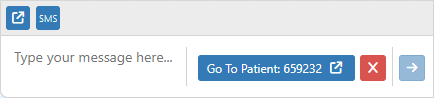
Click the SMS button above the typing box, or type #sms anywhere in the message. This will add the SMS icon next to the Send button, indicating the message has been flagged to be sent as an SMS in addition to appearing in Whisper.
SMS messaging is only available for individual conversations and does not confirm if the message was received on the recipient’s phone. This option is only available if the recipient has recorded their mobile phone number in their User Preferences.
Link to a Patient
-
Select the conversation from the Channel Selection Menu.
-
Click the blue share icon above the typing box.
-
Select the Use Current button to automatically fill the Patient ID of the currently open patient, or manually type the Patient ID.
-
Press the Save button to link the patient. Up to three patients can be linked in a single message.
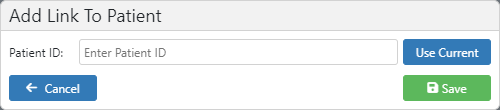
These links will allow members of the conversation to go a specific patient’s record by clicking each of the Patient ID buttons.
Patient Arrivals
When a patient’s booking is set to the Arrived status, the booking’s Doctor will receive a message to advise their patient has arrived for their appointment.
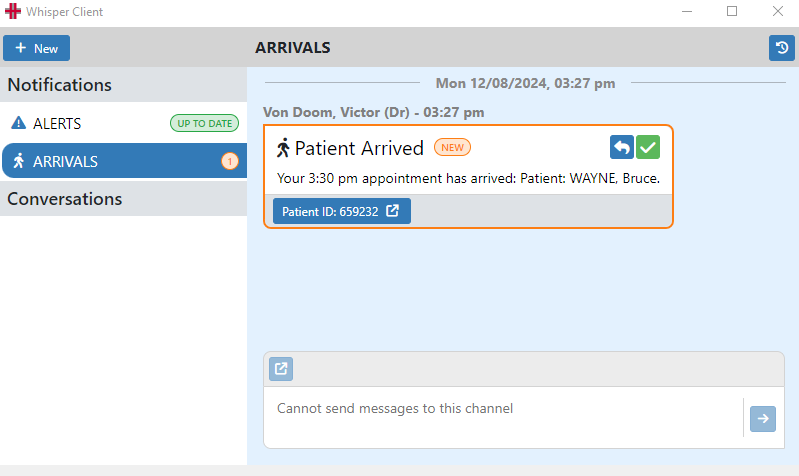
The doctor can open the associated patient by clicking the Patient ID button. This will open the patient in the main HealthTrack window.
| To acknowledge the message, click the green tick. This will remove it from the channel. |

|
|---|---|
| To reply to the staff member that marked the patient as Arrived, click the blue reply button next to the green tick. This will open a reply box. Type your message in the reply box and press the Enter key on your keyboard, or click the send button to the right. |

|
| To view the previously acknowledged Patient Arrivals, click the View Arrivals History icon at the top right. To hide the history, click the button again. |

|
The default behaviour for Patient Arrival Notifications for each user can be customised in two places:
-
Admin > Internal MO > Manage Internal MOs and change the Patient Arrived Alerts setting in the bottom in the bottom left.
-
Admin > Staff Directory by selecting the View button next to the user’s name to change the Patient Arrived Alerts setting.
User Preferences
You can customise your Whisper Messenger experience through File > User Preferences, using the Whisper Settings in the bottom right corner. Here are the available options:
-
Open Whisper when a New Message is Received: Enabling this setting will automatically open the Whisper window whenever a new message is received, ensuring you don’t miss important communications. If Whisper is already open, the new message will bring the Whisper window to the forefront. Additionally, depending on your Windows version, you may see the HealthTrack icon on your taskbar highlighted in orange to indicate a new message.
-
Keep Whisper Hidden: This option allows you to receive messages without any notifications, effectively silencing Whisper. Messages will accumulate in the Whisper Messenger, which you must manually check to see new communications. This setting is useful for minimising interruptions during focused work.
-
Never Receive Messages: This setting blocks direct messages from being sent to you, though you can still receive messages in custom groups or security groups you belong to. Notifications for these group messages are also suppressed. You can still send direct messages in Whisper, but the recipient will not be able to reply, making this option useful for certain privacy or workflow preferences.
The Open on Startup options in the bottom left of User Preferences also includes Whisper Messenger so that it can be configured to open as HealthTrack opens.
Internal MOs and Staff can also adjust their settings for Patient Arrival notifications.
Manager Features
Observing a User (Admin Only)
This option opens a read-only window displaying all the conversations the observed user has access to, updating live with any new messages.
-
Click Observe User at the top left of the Whisper Messenger window.
-
Select a user from the drop-down menu and press the Open button.
Whisper Audit Page (Admin Only)
Located at Admin > Notifications & Messages > Whisper Audit Page, this page lists all messages and notifications sent via Whisper Messenger. You can use search fields to find specific messages or topics, and filter columns to limit the information displayed.
Security & Permissions
-
AccessWhisper Permission: Required to use Whisper Messenger. This permission is included by default in the Default security group, ensuring most users have access.
-
WhisperAdmin Permission: Required to use the Observe User feature, available only to those in the HMS-Administrator security group. This feature will need to be assigned directly to users that require access to the Observing a User and Whisper Audit functions.