Online Bookings
The HealthTrack Online Booking system allows patients to make bookings directly into the Diary from your website. Patients can select the Booking Type, Doctor, Location, and Booking Date & Time, and the booking will be available in the Diary without any HealthTrack user input.
Configuration
If you would like to begin using the Online Bookings system, please contact HealthTrack Support for this feature to be enabled.
For bookings to be offered to patients online, there are three areas that will need to be enabled. Any bookings in your Diary templates that match those setups will be available online; these are the same bookings you will find available when using the Find Next button at the bottom of the Diary.
-
Booking types
-
Locations and Rooms
-
Internal MOs
Booking Types
Each booking type will need to be enabled in HealthTrack in order for it to be shown to patients.
To configure a booking type:
-
Navigate to Admin > Diary & Bookings > Booking Types.
-
Select an existing booking type.
-
Select the Edit button.
-
Tick the option for Enabled for Online Bookings.
-
Select the Save button.
-
Repeat Steps 2-5 for each booking type.
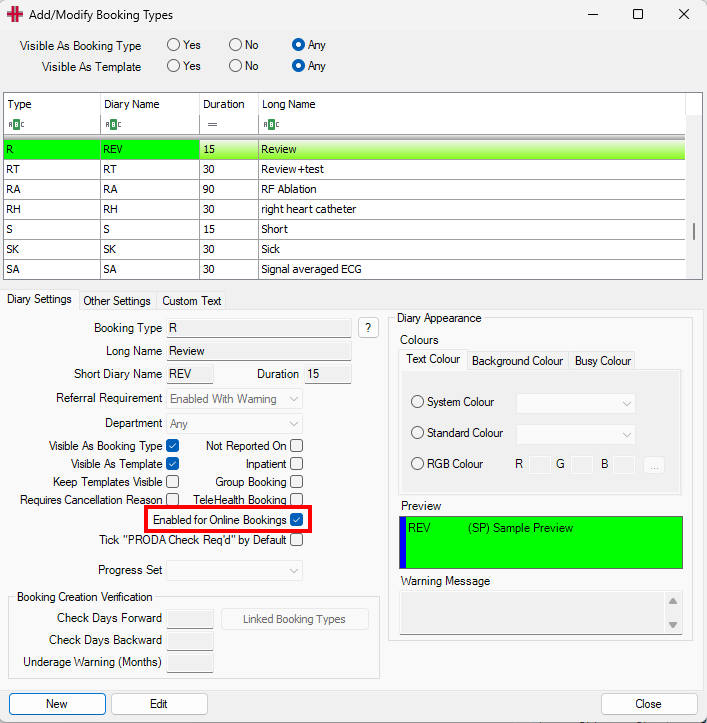
The Long Name will be used for patients to select a Booking Type online.
Locations
Patients can select which of your locations they create their booking at.
To configure a location for online bookings:
-
Navigate to Admin > Locations & Rooms > Locations & Rooms Manager.
-
Use the Select A Location drop-down in the top left to choose a location that will be available to patients.
-
Select the Edit button in the bottom left.
-
Tick the Enabled for Online Bookings box in the bottom left.
- You can optionally enter a phone number for patients to call in the Booking Phone No field.
-
Select the Save button.
-
Repeat Steps 2-5 for each location.
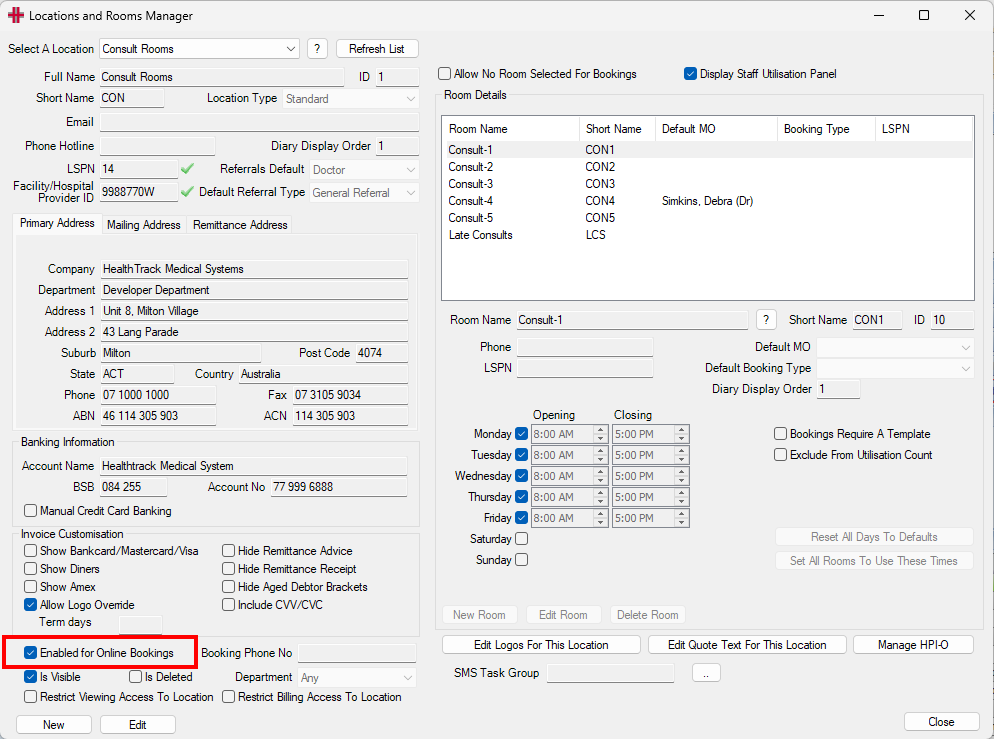
The Full Name for the location, as well as the Primary Address details, will be shown to patients when choosing a location for their booking.
Doctors
To configure a particular doctor for online bookings:
-
Navigate to Admin > Internal MO > Manage Internal MOs.
-
Use the Change MO drop-down in the top left to select a provider.
-
Select the Edit button in the bottom left.
-
Towards the top right, tick the option for Enabled for Online Bookings.
-
Select the Save button in the bottom left.

The doctor’s name and Professional Title will be shown to patients when choosing a provider for their booking.
Customisation
In Admin > Maintenance > Online Services Registration, there are a number of additional settings that can optionally be configured.
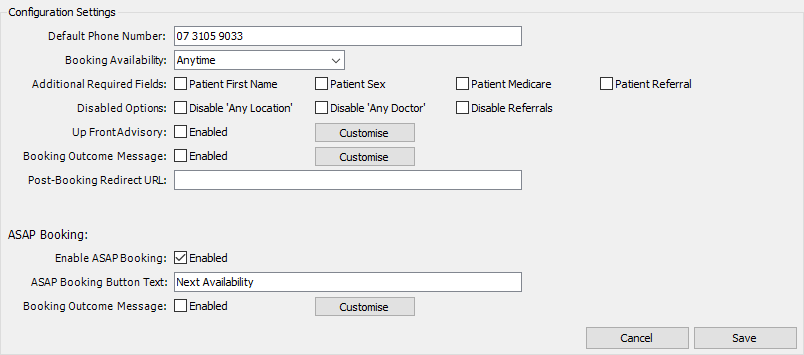
| Default Phone Number | This phone number will be displayed on the Online Booking website should patients need to contact the practice for assistance with creating their booking. |
|---|---|
| Booking Availability | This setting will limit the booking availability offered to patients, which prevents bookings from being created on short notice. For example, when the Booking Availability is set to “4 hours”, patients can only choose from the available bookings that take place at least 4 hours from the current time. |
| Additional Required Fields | This option makes the selected fields “Required”, which means the patient cannot proceed with creating a booking until this information has been entered. The options that can be set as “Required Fields” includes the patient’s Given Name, Sex, Medicare Number and IRN, and a Referral upload. |
| Disabled Options | This option can be used to prevent patients from using the options for Any Location or Any Doctor when creating their bookings; this means the patients are required to choose a specific Location and/or Doctor. The option to upload a Referral can also be disabled. |
| Up Front Advisory | If there is information the patient should know before creating their booking, this can be configured by selecting the Customise button for the Up Front Advisory. Once this message is complete, the Enabled box can be ticked to display this message to users. Once enabled, patients will be presented with this information, and will be required to tick a box confirming the Up Front Advisory has been read and understood. |
| Booking Outcome Message | After the patient creates their booking, the screen will display the details of their booking, along with the option to create another booking. The Booking Outcome Message allows you to insert a message on this page with additional details. This message will only appear for scheduled bookings with a date and time. |
| Post-Booking Redirect URL | After the patient creates their booking, the Done button can be configured to take the patient to a specific webpage, such as back to your website. |
| ASAP Booking Enabled | An “ASAP” booking allows a patient to request a booking when a provider is next available. This option does not schedule a booking on a selected date and time, but will instead add the patient to the Triage system. |
| ASAP Booking Button Text | After the patient has selected a booking type, doctor, and location, they can choose to Schedule Appointment on a nominated date and time. If the ASAP Booking option is enabled, the patient can alternatively make a booking without selecting a date and time; the text on the button for this option can be customised using the ASAP Booking Button Text, such as “Next Available”. |
| Booking Outcome Message | After the patient creates their booking, the screen will display the details of their booking, along with the option to create another booking. The Booking Outcome Message allows you to insert a message on this page with additional details. This message will only appear for an “ASAP” booking. |
Publishing to Website
Once all the required booking types, locations and doctors have been enabled, you can publish the bookings online, allowing bookings will be offered to patients online per the availability indicated by your Diary templates.
To publish bookings online:
-
Navigate to Admin > Maintenance > Online Services Registration.
-
On the Online Services Registration screen is “Your Website URL”. Use the Copy to Clipboard to copy the link.
-
Paste the link in places to be accessed by your patients, so that they may create a booking, e.g. letter templates or your company website.
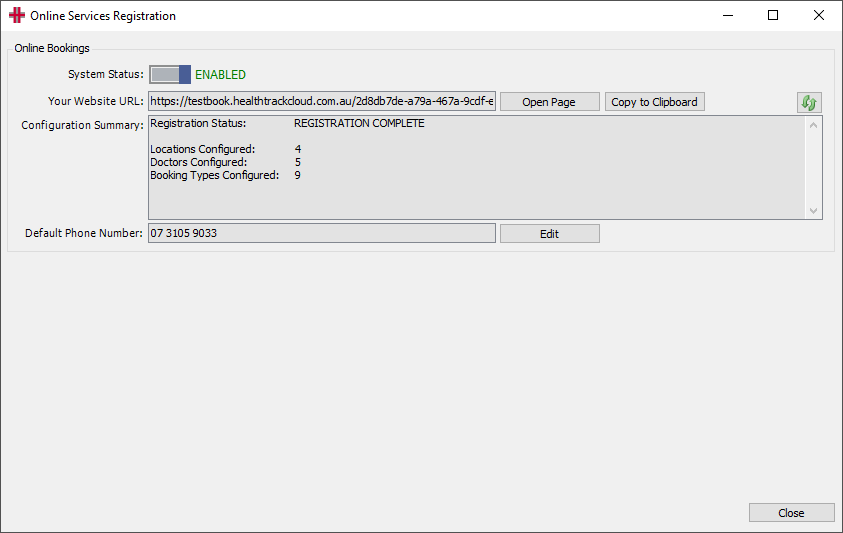
When Online Bookings is enabled, as indicated by the System Status, the system will immediately sync all data. The data is also synced every time a location, provider, or booking type is enabled/disabled with the Enabled for Online Bookings box in the respective screens.
Disabling Online Bookings
Online Bookings can be disabled per booking type, location, or provider by unticking the Enabled for Online Bookings box in the respective screens. This will remove any related bookings from being offered online.
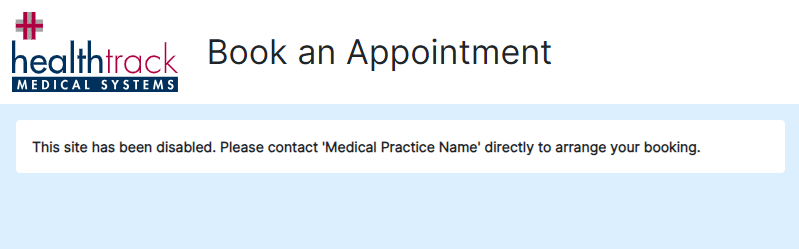
Online Bookings can be disabled in Admin > Maintenance > Online Services Registration. Once disabled, all data offered online will be deleted from the internet. If this is then enabled again, the data will be fully re-synced. If Online Bookings is disabled, the patient will see a screen like below.
Patients – Using Online Bookings
Once the setup and configuration are complete and the Online Booking URL has been published to your website, patients can use the link to make bookings directly from your website to your HealthTrack Diary. To do this, they can follow the steps to fill in their information as below.
Personal Details
The landing screen for Online Bookings will ask the patient for their details. Fields marked with a red asterisk * are required to be filled in before proceeding. Patients can also upload a file, such as a PDF or photo of their referral and make any relevant comments regarding themselves or their booking.
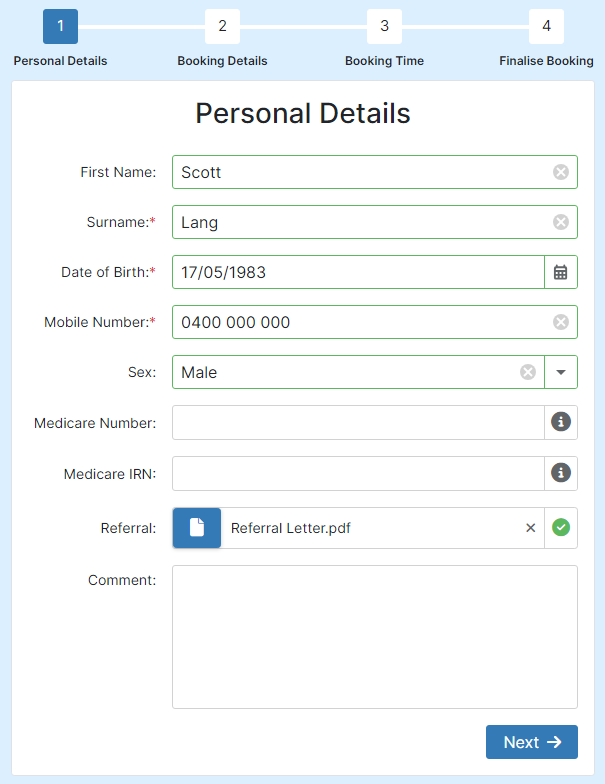
When the patient has entered all of their required information, they can select the Next button to continue onto their booking.
Uploading a Referral:
Patients are able to upload a file up to 4mb in size. Only images (e.g. .png, .jpeg) and documents (e.g. .pdf, .docx) are able to be uploaded.
Any files uploaded by a patient are automatically scanned for malware, and the patient will be unable to submit their booking if malware is detected.
The Referral option may be enforced or disabled based on the Customisation options outlined in the Configuration section.
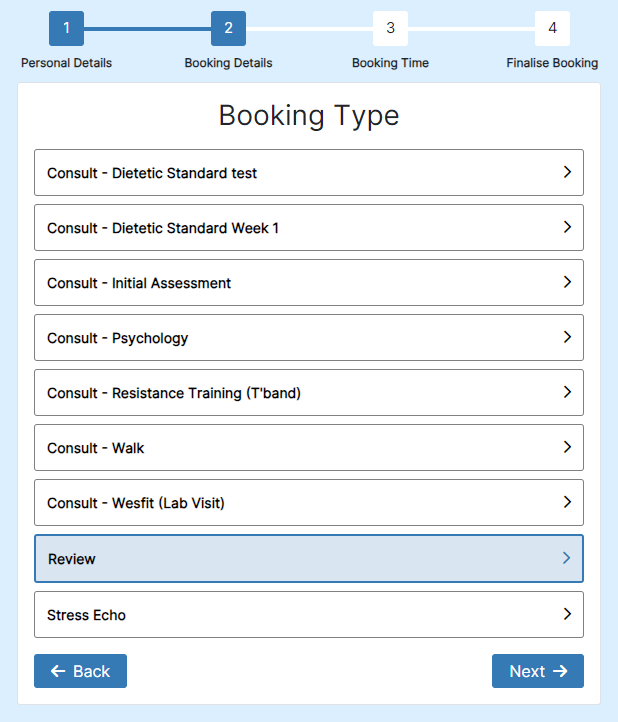
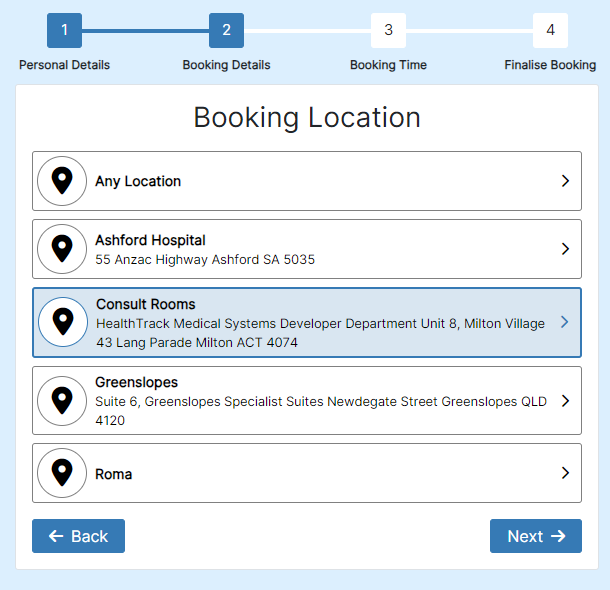
Booking Details
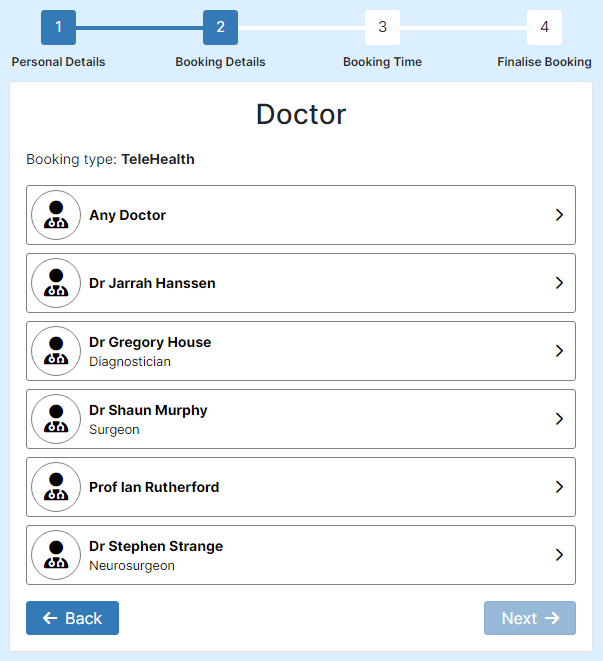
The Booking Details will provide the patient the options for Location, Doctor and Booking Type. If the patient has no preference, there are options for the patient to select Any Location or Any Doctor, but a Booking Type selection is required. The options for Any Location or Any Doctor can be disabled in the Customisation options listed in the Configuration section.
| Booking Type |
|
|---|---|
| Doctor |
|
| Booking Location |
|
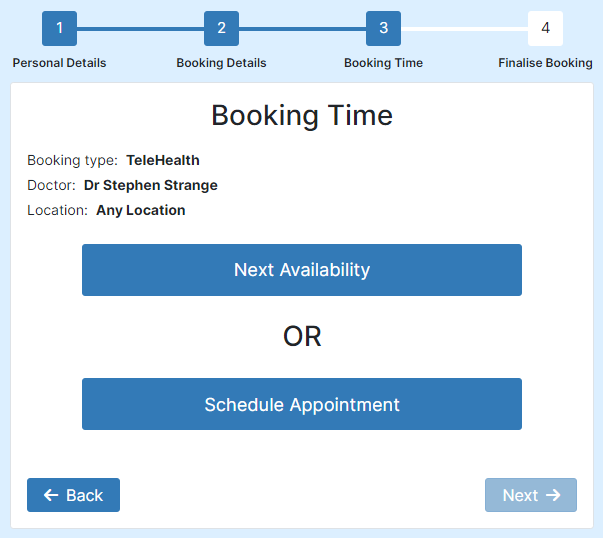
Select a Booking Date & Time
Once the patient has filled in their personal details and made selections for the desired location, doctor and booking type, they will be presented with available booking dates and times, based on the Diary Templates in your HealthTrack Diary.
If the ASAP Booking option has been enabled, patients will first have the choice to select between this option and the Schedule Appointment button, according to the Customisation options in the Configuration section. The ASAP Booking option will skip the booking date and time selection, and go directly to the Finalise Booking screen.
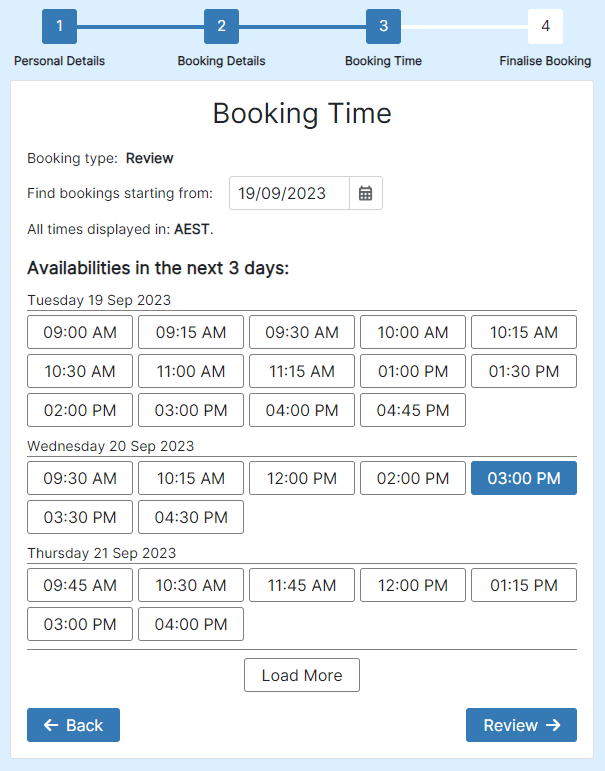
If ASAP Booking is not enabled, or the patient chooses the Schedule Appointment button, the patient can select their preferred date and time from the list of bookings offered, then select Review to continue to finalise their booking.
Verifying and Submitting Online Booking
Upon selecting the Review button, the patient will automatically receive an SMS message to the mobile number entered in the Patient Details section; this message will contain a verification code, which should be entered in the Mobile Verification section. This is used to confirm that the patient’s mobile number is correct, which ensures the patient can be contacted regarding their booking.
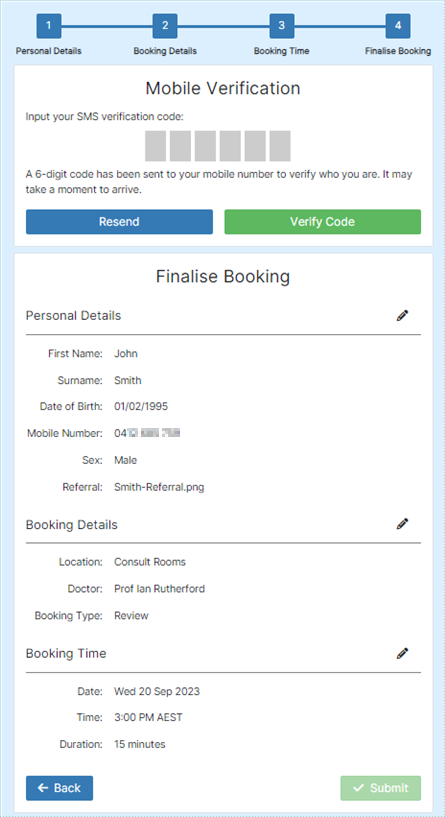
After selecting the Verify Code button, the patient can review the selections for their booking, and choose the Submit button to create the booking. If the Booking Outcome Message has been configured, this text will appear to the patient on the Booking Submitted screen. The patient can then proceed to select the Book Another Appointment button, or can select the Done button to go to a nominated URL.
Submissions in HealthTrack
Matching to an Existing Patient
When an Online Booking is created, HealthTrack will attempt to match the details of the booking to an existing patient in HealthTrack. This matching based on the patient’s:
-
Given Name
-
Family Name
-
Date of Birth
-
Mobile Number
-
Medicare Number
If HealthTrack cannot uniquely match to an existing patient based on enough details, a new patient will be created.
The mobile number is a requirement to match to an existing patient; if an existing patient uses a different mobile number to create an Online Booking, a new patient will always be created.
After a booking is created online, this will appear in the Diary according to the details selected by the patient. The Notes on the booking will reflect that it was created via the Online Booking system, along with the date and time it was created. If the patient entered any comments, these details will also appear in the Notes.
Referral Uploads
If a referral document/image is uploaded by the patient when requesting a booking, two records are created:
-
A document will be created in the Documents tab of the patient’s record. The default folder for these records is the Referral folder.
-
A referral entry will be created in the Patient Management tab of the patient’s record. This referral will be labelled as an INCOMPLETE REFERRAL as the details of the referral are yet to be entered. Users can modify the incomplete referral to specify the appropriate dates, referral type, and providers, as well as any other details necessary. After modifying the referral, it will no longer be labelled as an incomplete referral.
ASAP Bookings & Triage
All ASAP bookings can be located in Practice Wide > Triage. In this screen, a new configuration will be available in the top left for All Booking Requests, which can be used to view any ASAP booking requests.
As with the scheduled bookings, the Notes on the Triage record will reflect that it was created via the Online Booking system, along with the date and time it was created. If the patient entered any comments, these details will also appear in the Notes.
There are two workflows that can be used to create a booking based on the Triage record:
Take Patient – For Providers
-
Navigate to Practice Wide > Triage.
-
If you are a provider, ensure the option for I will be accepting patients is ticked and sign in as needed.
-
From the All Booking Requests configuration, highlight a record.
-
Select the Take Patient button in the bottom right of the screen.
-
In the Booking Form window, nominate any details relevant for the booking. The Location, Purpose, Date, Time, and Actual MO will be populated automatically.
-
The Date and Start Time of the booking will be the current date and time.
-
The Doctor will be populated as the provider that selected the Take Patient button, which may not be the provider selected by the patient when requesting a booking.
-
The Location and Room will be populated based on the details selected when signing in to Triage, which may not be the location selected by the patient when requesting a booking.
-
-
Select the Save or Save and Close button to create the booking in the Diary.
After saving the new booking, the Triage entry will be completed.
Schedule to Diary – For Non-Clinical Users
-
Navigate to Practice Wide > Triage and sign in as needed.
-
From the All Booking Requests configuration, double-click on an entry.
-
Nominate any details for the Location, Purpose, Date, Time, and Actual MO.
-
Choose the Schedule to Diary button to open the Diary.
-
From the Move List on the left-hand side, select the patient to be scheduled.
-
Select an available booking slot in the Diary.
-
From the Move List, select the => button to create the booking in the selected slot.
After saving the new booking, the Diary and Triage entry will close.
For more information, please see the Triage section of this manual.