Custom fields
Setting up Custom Fields
Custom fields provide the ability to define your own set of fields which are very useful for tracking patients:
-
in studies
-
in research programs
-
with/out additional factors that may impact their care
Once custom fields have been created, these fields can be assigned to the appropriate patients, then using the Advanced Search function you can search and report on these patients.
To add, modify or delete Custom Fields go to the Admin > Custom Fields
The Custom Fields Administration screen will open. The list on the left-hand side of the screen will show you all Custom Fields that have already been created. If you select one of these custom fields the details will be displayed in the right-hand side of the screen.
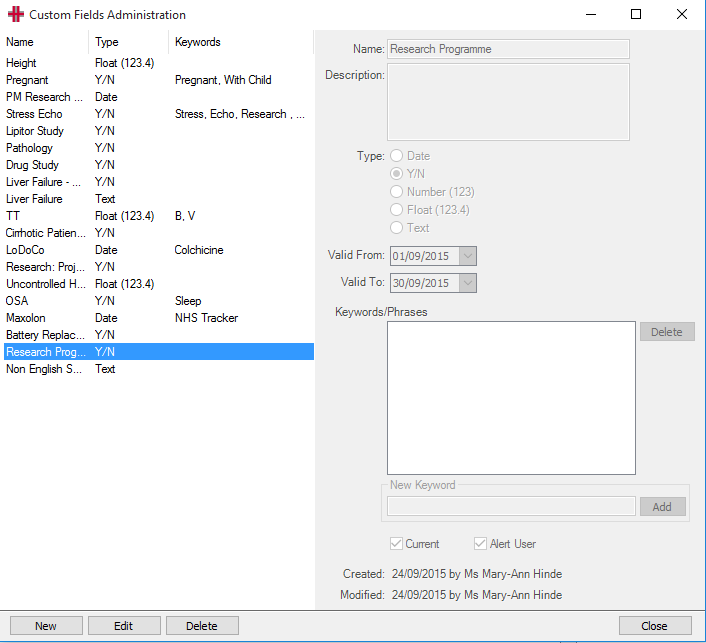
To create a new Custom Field click on the New button. The right hand-side of the screen will now be enabled and ready for you to enter in your new Custom Field.
Name: Is the name of your custom field and will be what the users see when it has been assigned to a patient.
Description: Is where you can record additional details about the custom field
Type: Can be; Date, Y/N, Number (no decimal places), Float (can capture a decimal place), Text (free text field). The type is what the users will complete when adding a custom field to the patient. For example you may just want to know if they are in the study. Therefore you would use the Y/N type. Alternatively if you wanted to know the date that they joined the study you would use the date option.
Keywords/Phrases: A future enhancement to come.
Current: If selected the custom field is a current option and can be selected by the user.
If the custom field is no longer required unselect the current check box. The users will no longer be able to add this custom field to patients however the patients with this flag will still show the field and you can still report on the custom field.
Alert User: The Alert User tick box will set up an alert for any patient with this Custom Field. It will pop up an alert when the patient demographic is opened, or when the current patient is refreshed.
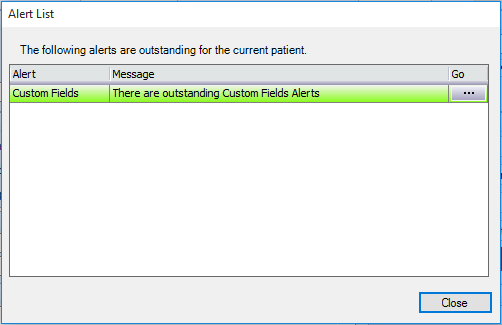
From the Alert List pop up, the user can select the … from the box on the right to open the Custom Fields Manager for the patient, to see a full list for what applies to the patient.
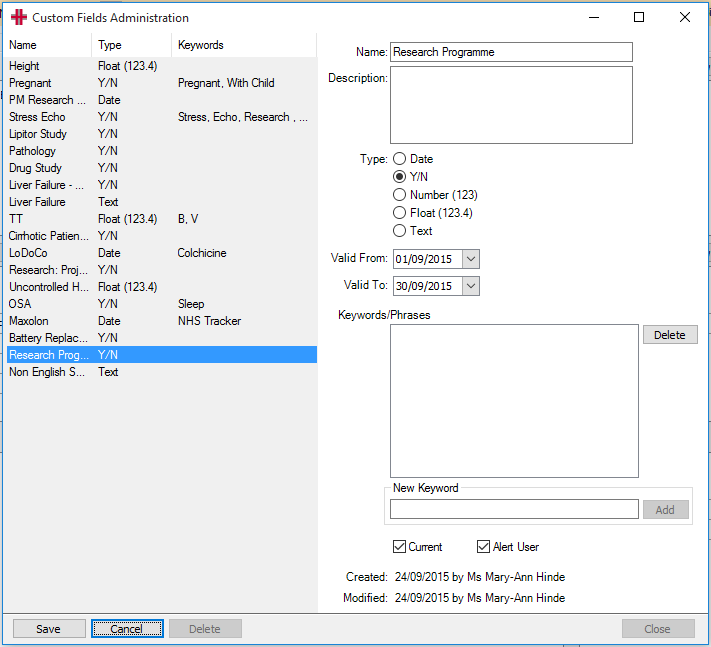
Once you have entered all the details click on the Save button.
You can edit the custom fields at any time by selecting the custom field requiring changes and clicking on the Edit button.
Custom Fields can also be deleted, please note this will also remove the patient entries for that custom field. Using the Current check box is a better option if the custom field has been used.
Adding a Custom Field
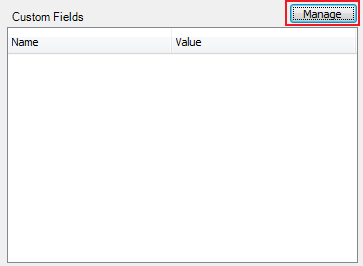
To add a Custom Field go to the patients’ Clinical Summary tab; click on the Manage button
The left-hand side of this screen will list all Custom Fields available.
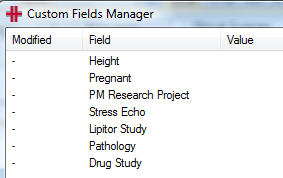
Click on the custom field that you want added to the patient. The details for the custom field will now be displayed in the right-hand side of the screen.
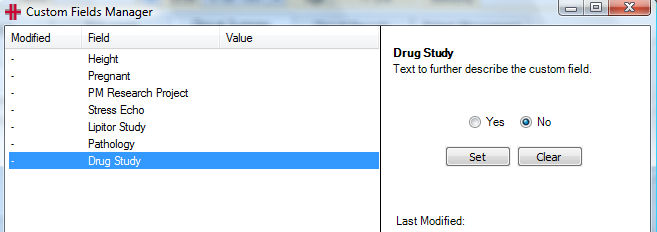
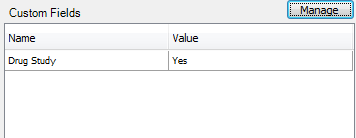
You will need to set the custom field and its value and then click the Set button to add the Custom Field to the patient. Once you have added all custom fields for this patient click on the Close button. The custom fields will now be displayed on the Clinical Summary screen.
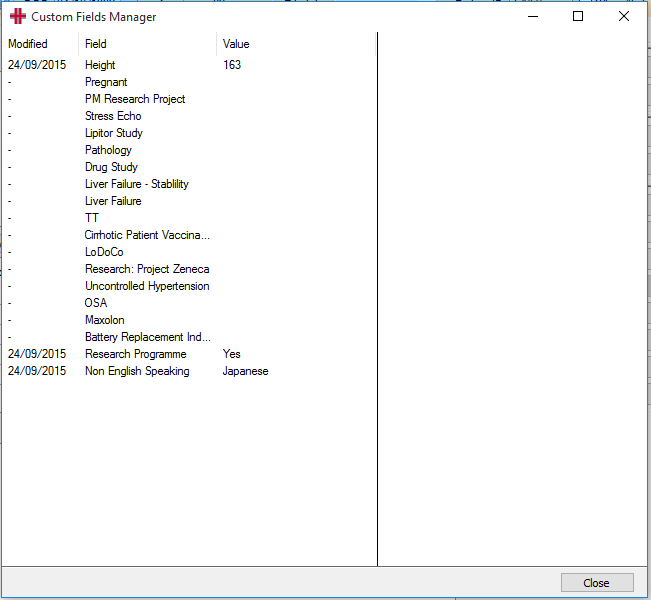
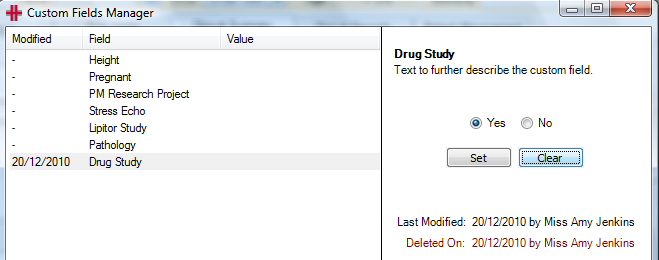
You can edit or remove a custom field from a patient at any time. To make any changes to the patient’s custom fields click the Manage button. The Custom Fields Manager screen will become available. The custom fields that have been added to the patient will have a modified date and the value recorded. Click onto the custom field that you want to edit or remove. If editing make the changes required and click the Set button.
To remove the custom field from that patient click the Clear button. It will now show the custom field has been deleted and by whom.
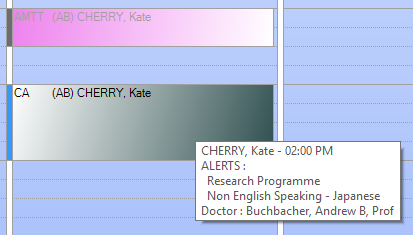
Custom Fields in the Diary and Booking Form
When the Alert User option has been ticked in the Custom Fields record in the Admin menu, this will display an alert to the user on the Booking Form, which will display the first Custom Field for this patient. Typically there would only be one Custom Field for a patient but if there is more than one then the user would need to refer to the Custom Fields table in the Clinical Summary screen for the full Custom Fields list.
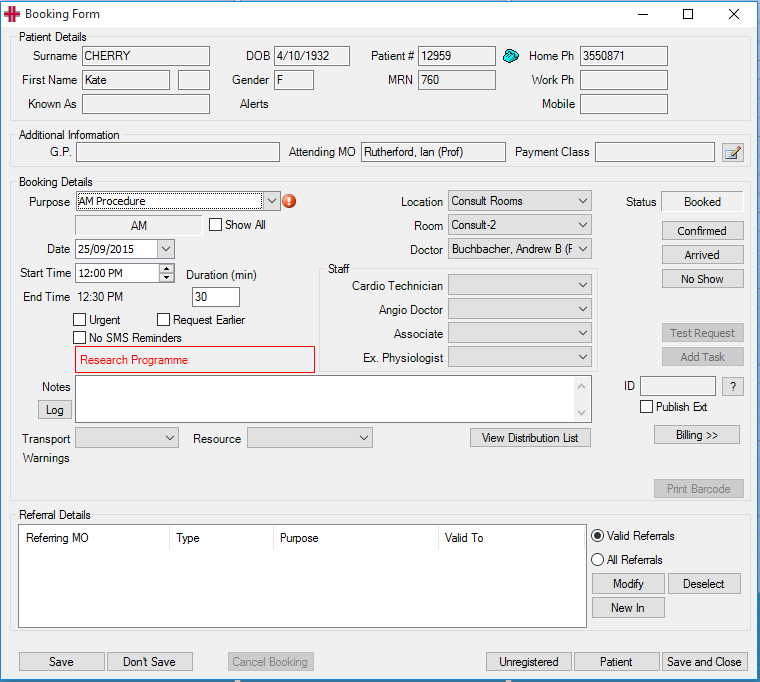
When viewing bookings for a patient with a Custom Field that has the Alert User selected, they will show with a colour gradient in the diary. This colour will be the standard colour configured for that booking type, but with a colour gradient to inform the user that there is a Custom Field Alert for this patient.

When a gradient booking is seen in the diary, the user can quickly see what the alert is by hovering the mouse over the booking, which will show all Custom Field Alerts for the patient, including any additional details entered for that patient.